Microsoft Teams integration
The Microsoft Teams integration delivers InstantFeedback notifications and reports to the Teams channels your team uses. Once it is set up, your team gets:
- A message for every new grade, and a separate message for every comment. Positive, negative, and other comments can go to different channels.
- Daily, weekly, or monthly feedback reports per campaign.
- Account-wide default channels, with the option to override them for individual campaigns.
Messages flow one way, from InstantFeedback to Teams. Each Teams channel is connected through a Workflows webhook: you create a workflow in Teams, copy its webhook URL, and paste it into InstantFeedback. InstantFeedback never reads anything from your Teams workspace.
Before you start
- You need the admin role on the InstantFeedback account. Other members can view the Teams settings but cannot change them.
- You need a Microsoft Teams account that can add workflows to the channel. The Workflows app must be available in your Teams organisation, and you must be a member of the channel you want to connect.
Enable the integration
- Open Settings → Integrations. Each tile shows a coloured dot: green when the integration is active, red when it is not.
- On the Microsoft Teams tile, click Settings. The first click creates the Teams configuration for your account and opens the Teams settings page.
- If the page title shows a red dot, click Activate in the top-right corner and confirm.
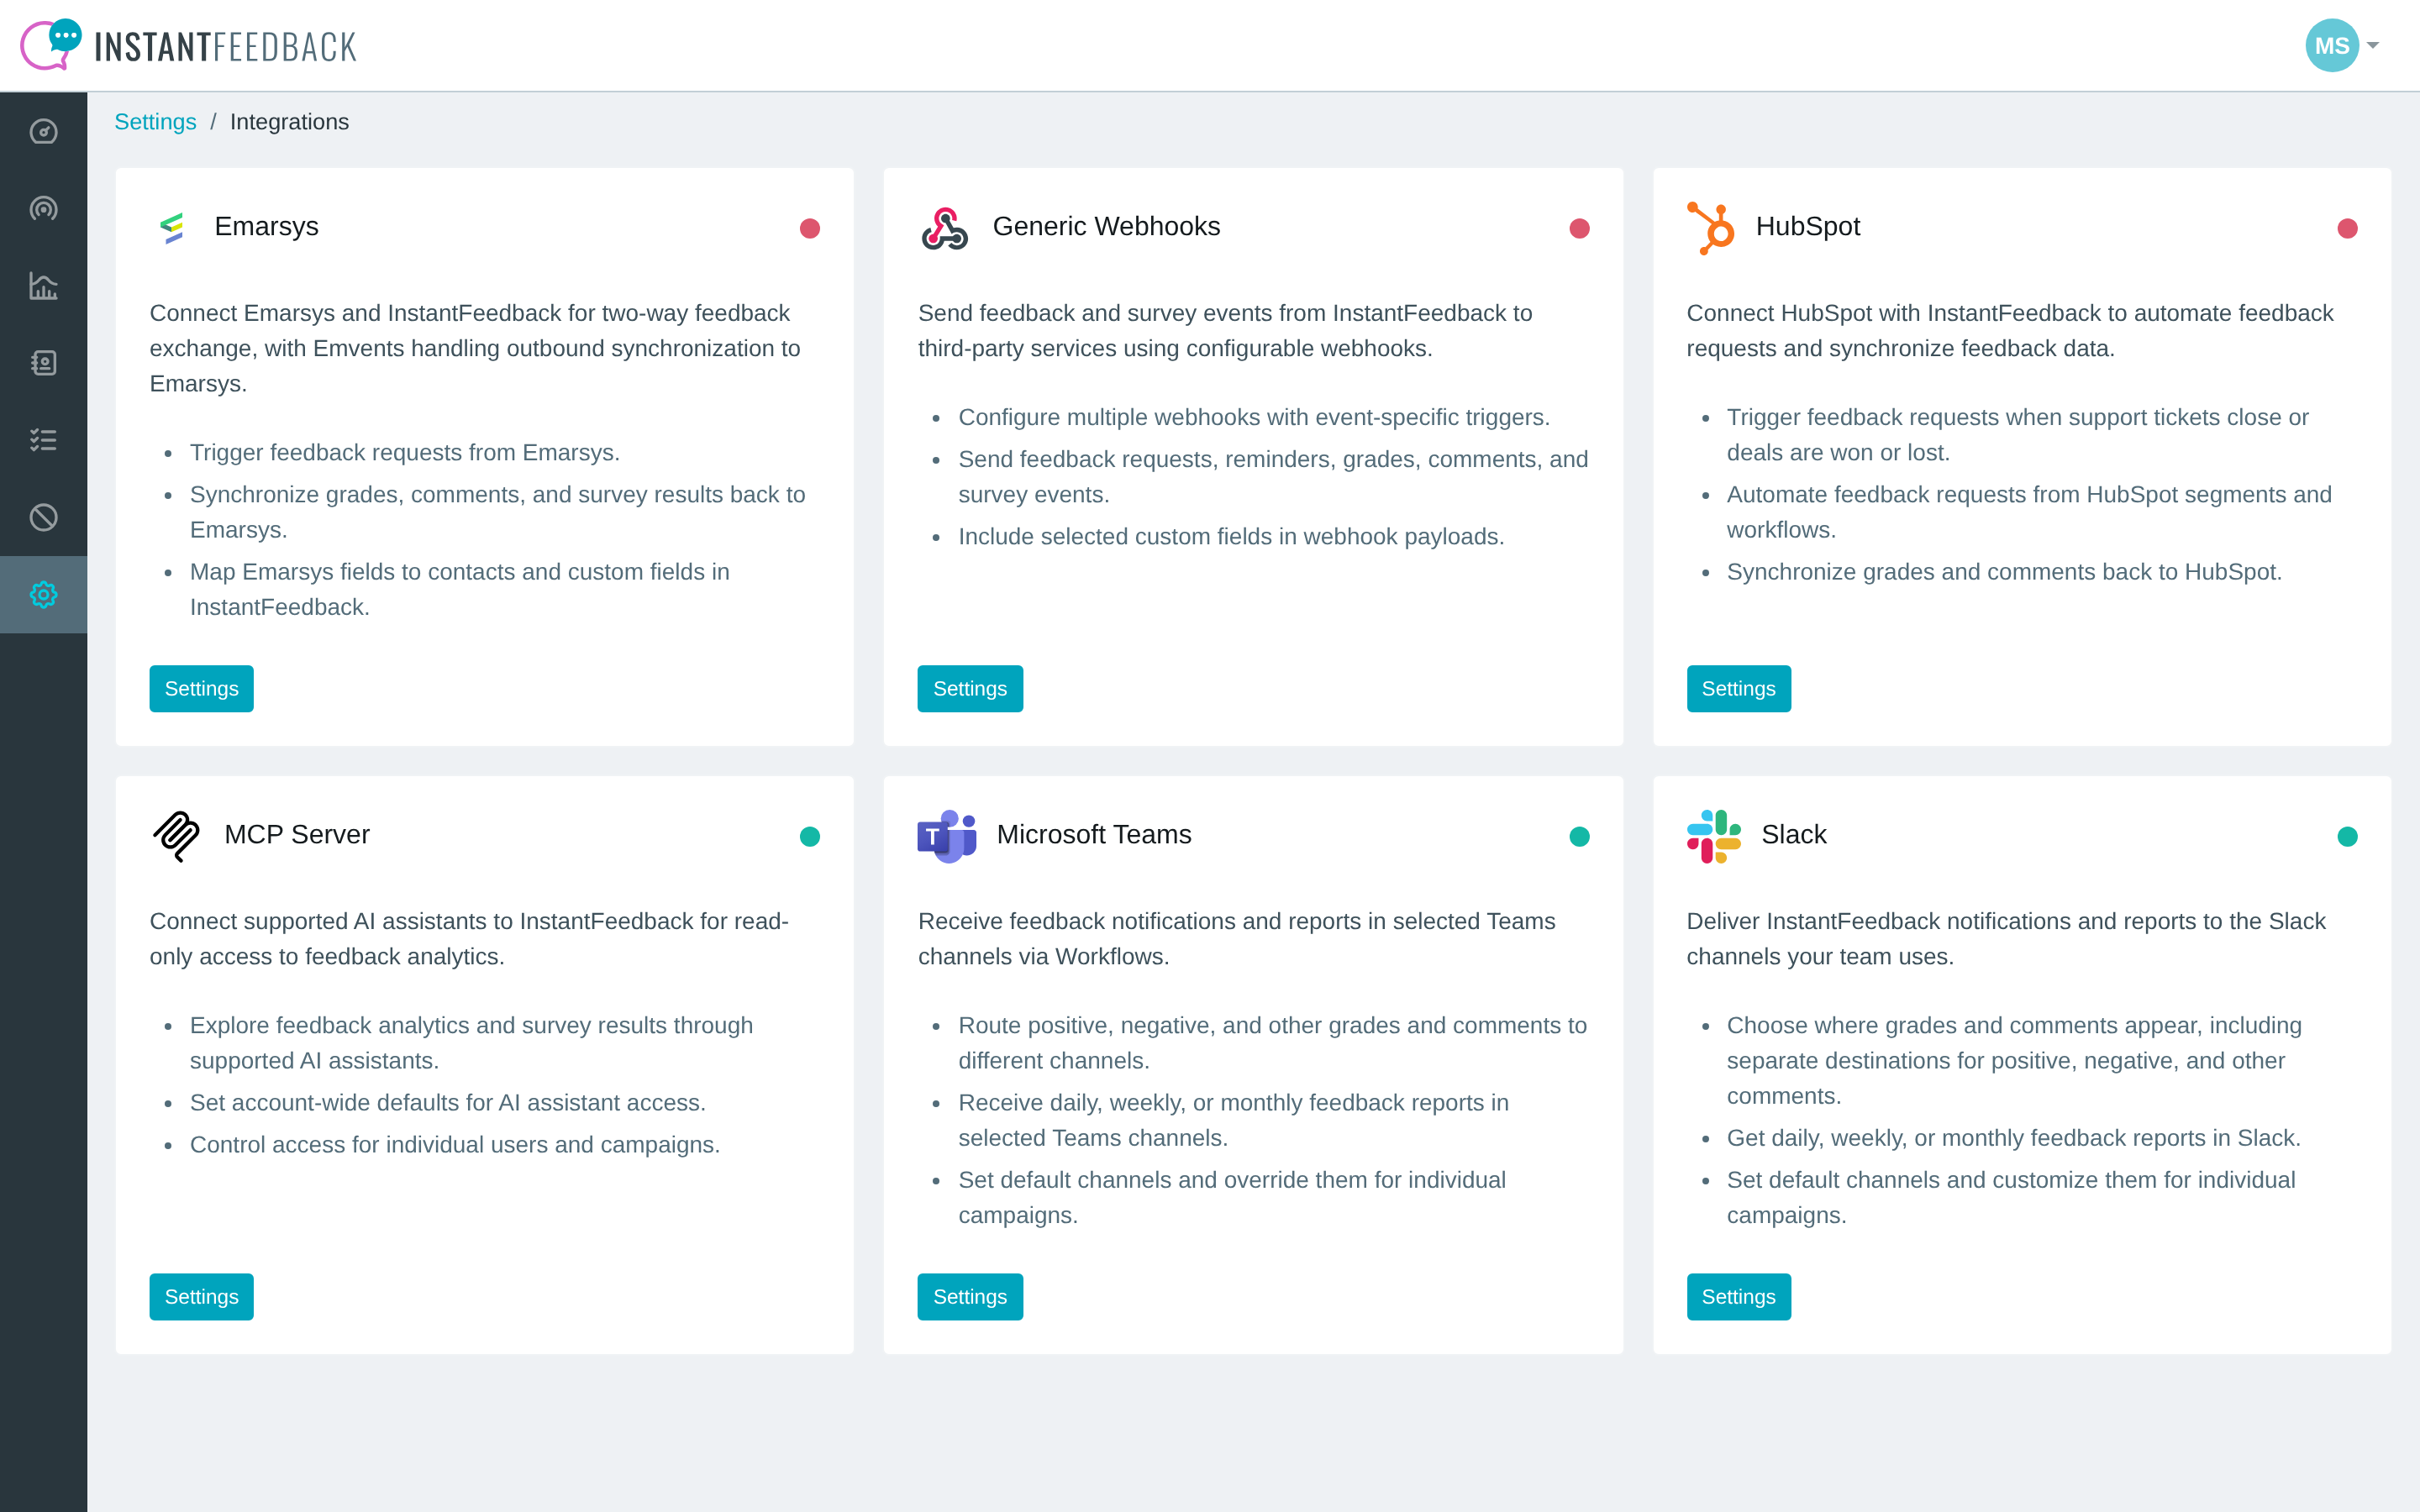
The Integrations page. The Microsoft Teams tile is active (green dot).
Get a webhook URL from Microsoft Teams
InstantFeedback posts messages through the Teams Workflows app, using the template Send webhook alerts to a channel. Do this once for every channel that should receive messages.
-
In Microsoft Teams, open the channel and click the ⋯ (More options) menu next to the channel name, then choose Workflows.
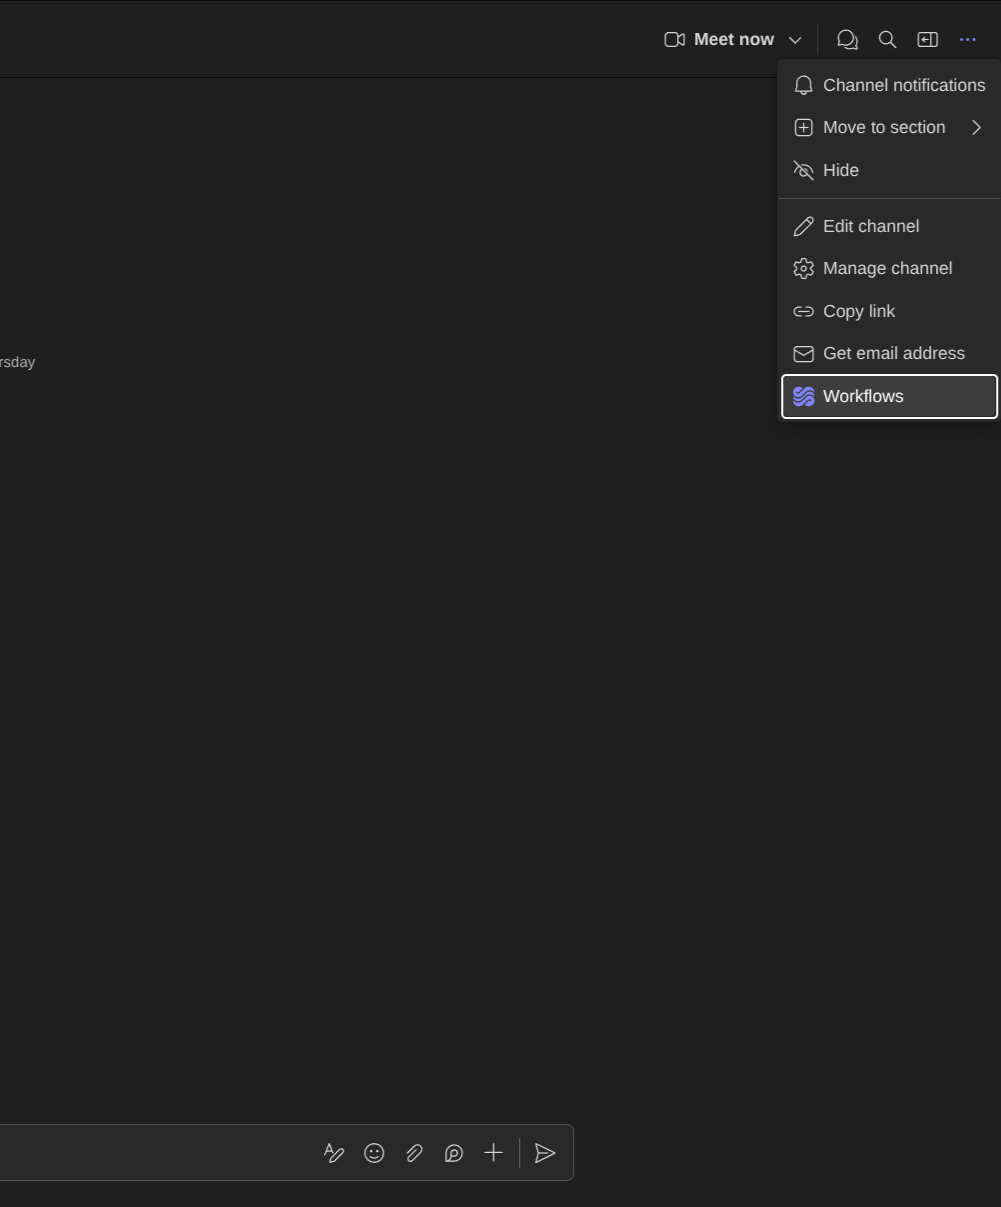
Open Workflows from the channel menu.
-
Search for webhook and select the template Send webhook alerts to a channel.
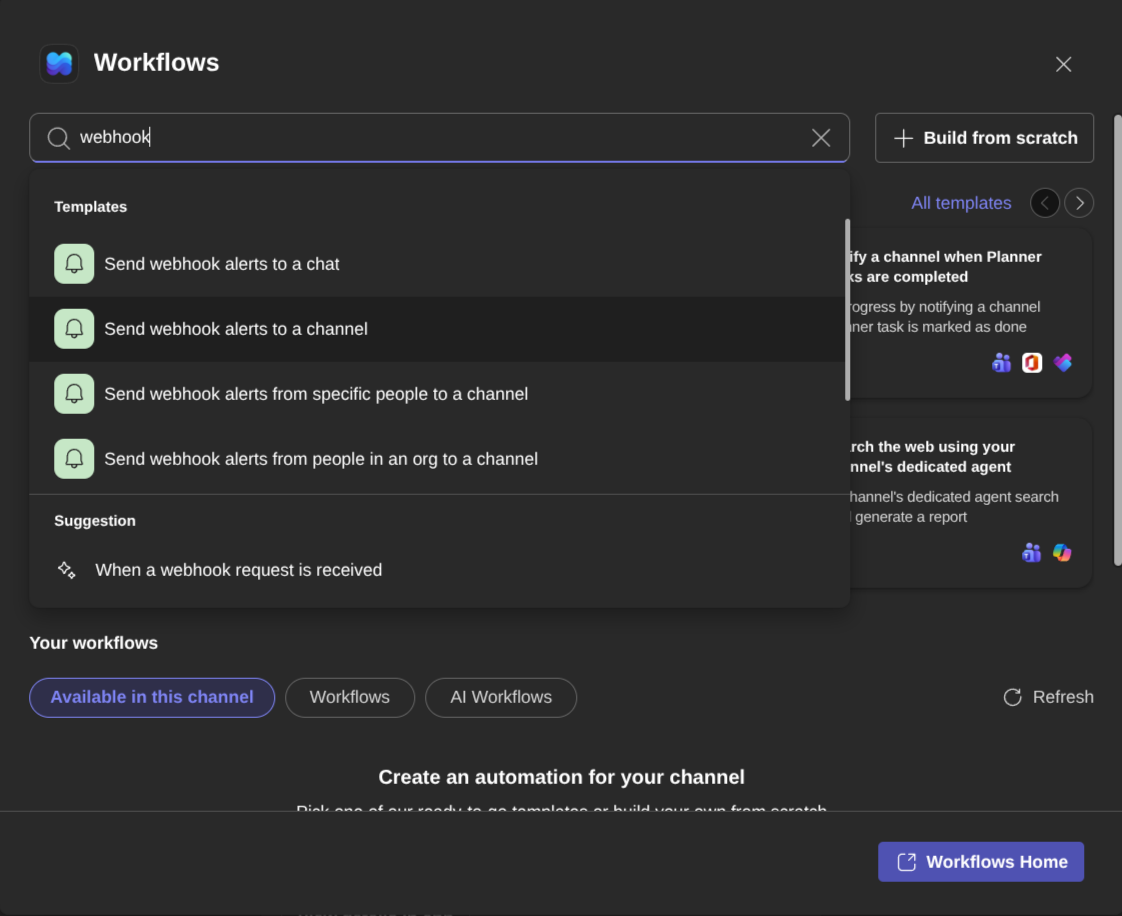
Pick the webhook template.
-
Give the workflow a recognisable name, for example InstantFeedback – Customer feedback.
-
Check that the right Team and Channel are selected, then click Save.
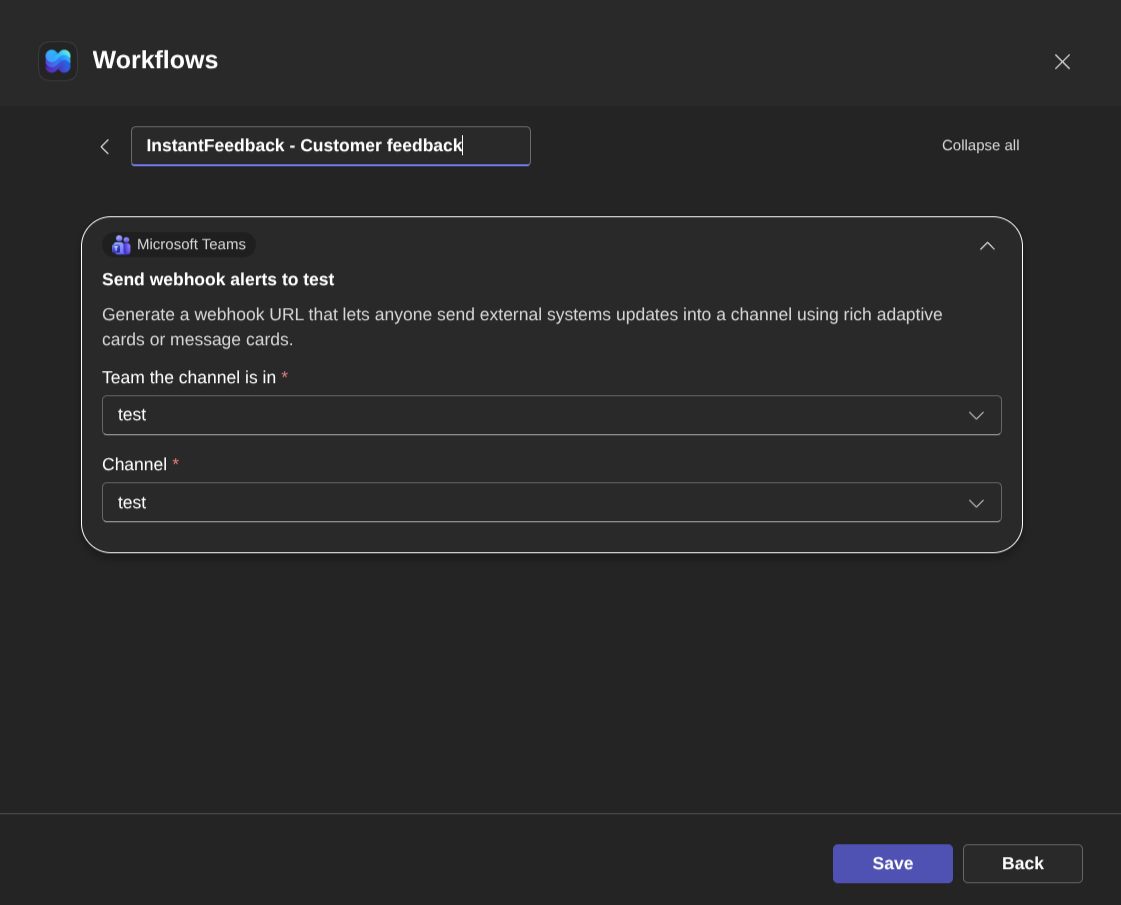
Confirm the team and channel.
-
Teams opens the overview of the new workflow. Click Copy webhook link and keep the URL ready for the next section.
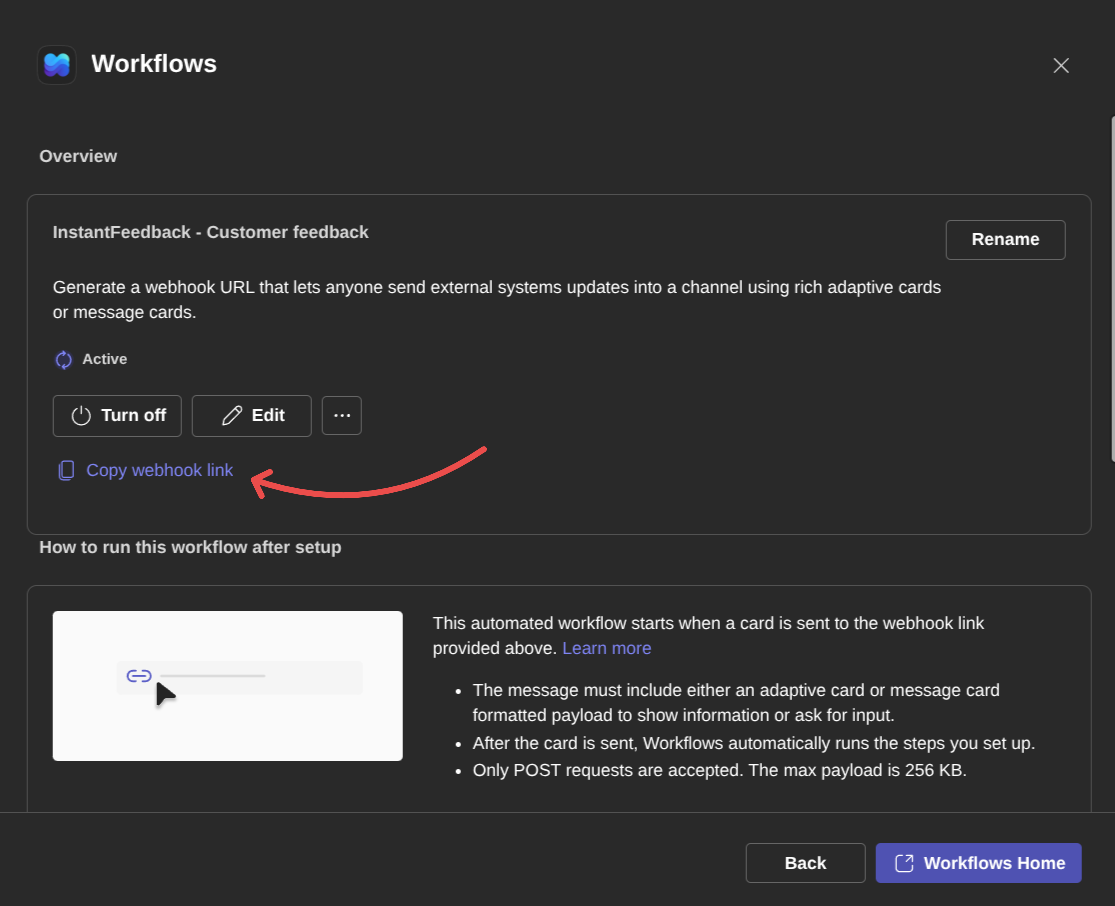
Copy the webhook link from the workflow overview.
Finding the URL later
If you close the dialog without copying the link, open Workflows from the channel menu again, select the workflow under Your workflows, and click Copy webhook link on its overview page.
Treat the URL like a password
Anyone who has the URL can post messages to the channel. Share it only with people who manage the InstantFeedback integration.
The workflow runs under the account of the person who created it. If that person leaves the organisation or loses access to the channel, messages stop arriving. Create the workflow with a shared or long-lived account where possible, and add co-owners in Power Automate.
Add the channel to InstantFeedback
- On the Channels tab, click Add channel.
- Enter a Name for the channel and paste the Webhook URL you copied from Teams. The name is only used inside InstantFeedback, so pick one that describes the destination.
- Click Save. The channel appears in the table and a confirmation reads Channel name added successfully.
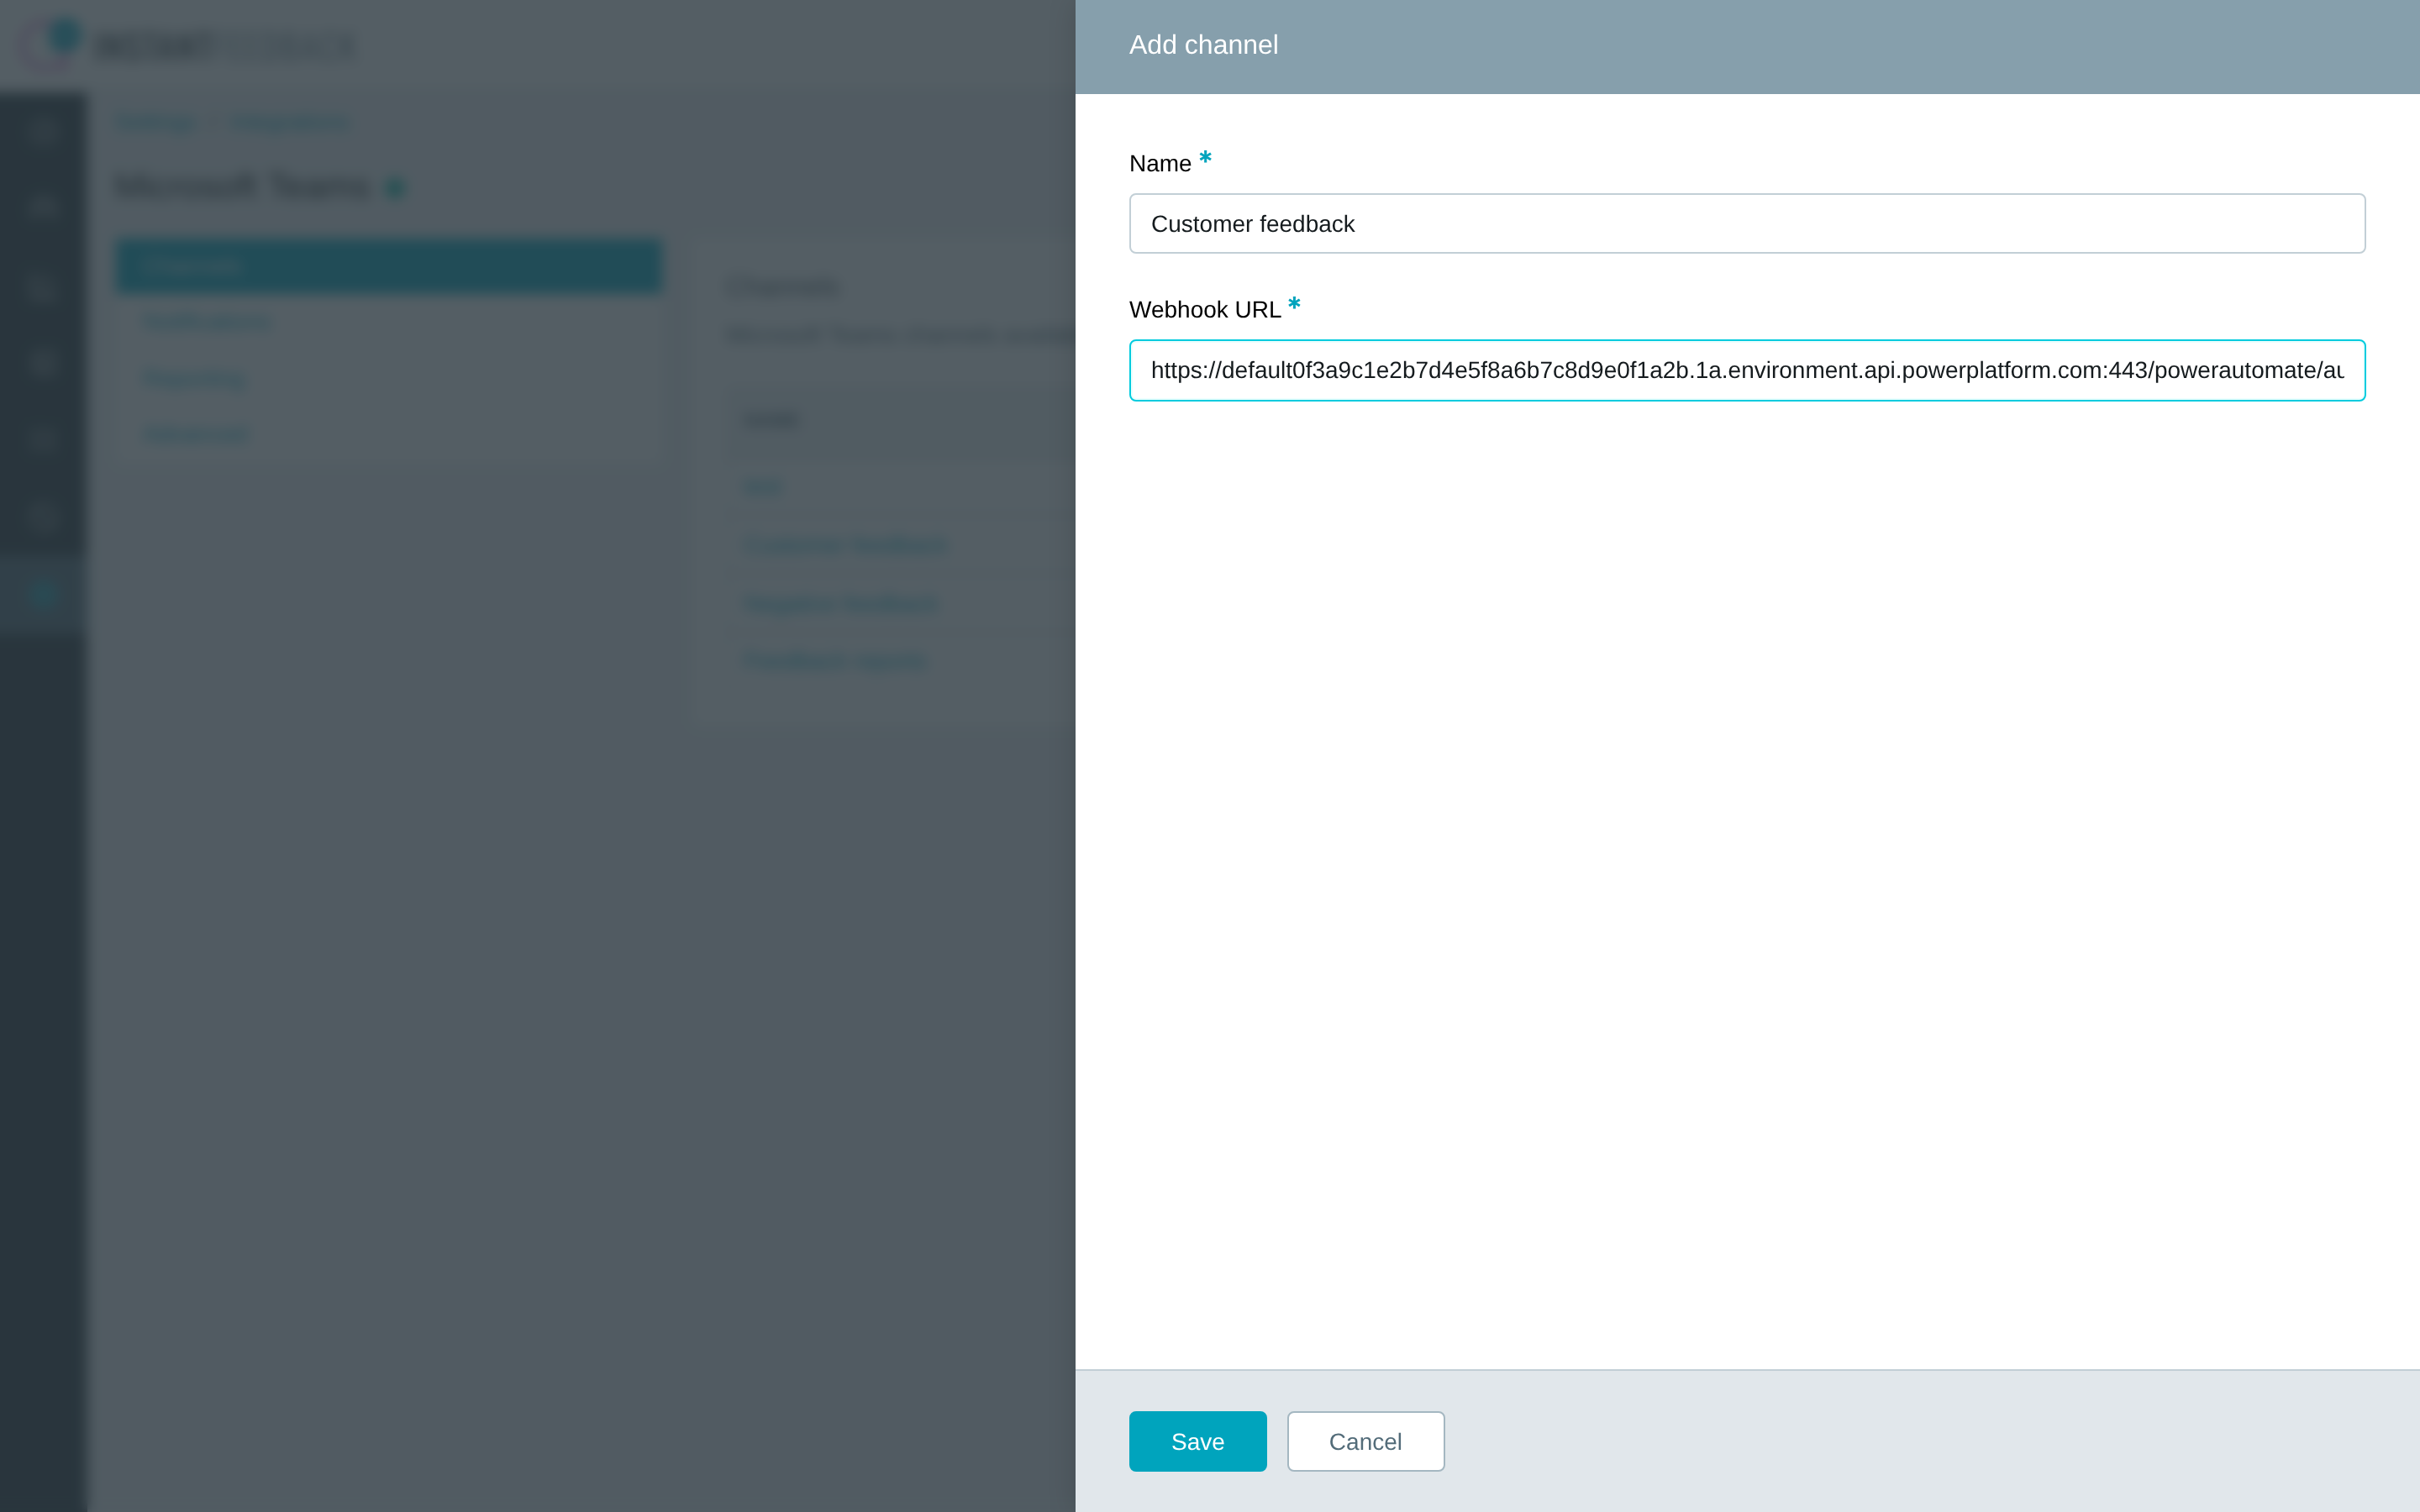
Name the channel and paste the webhook URL.
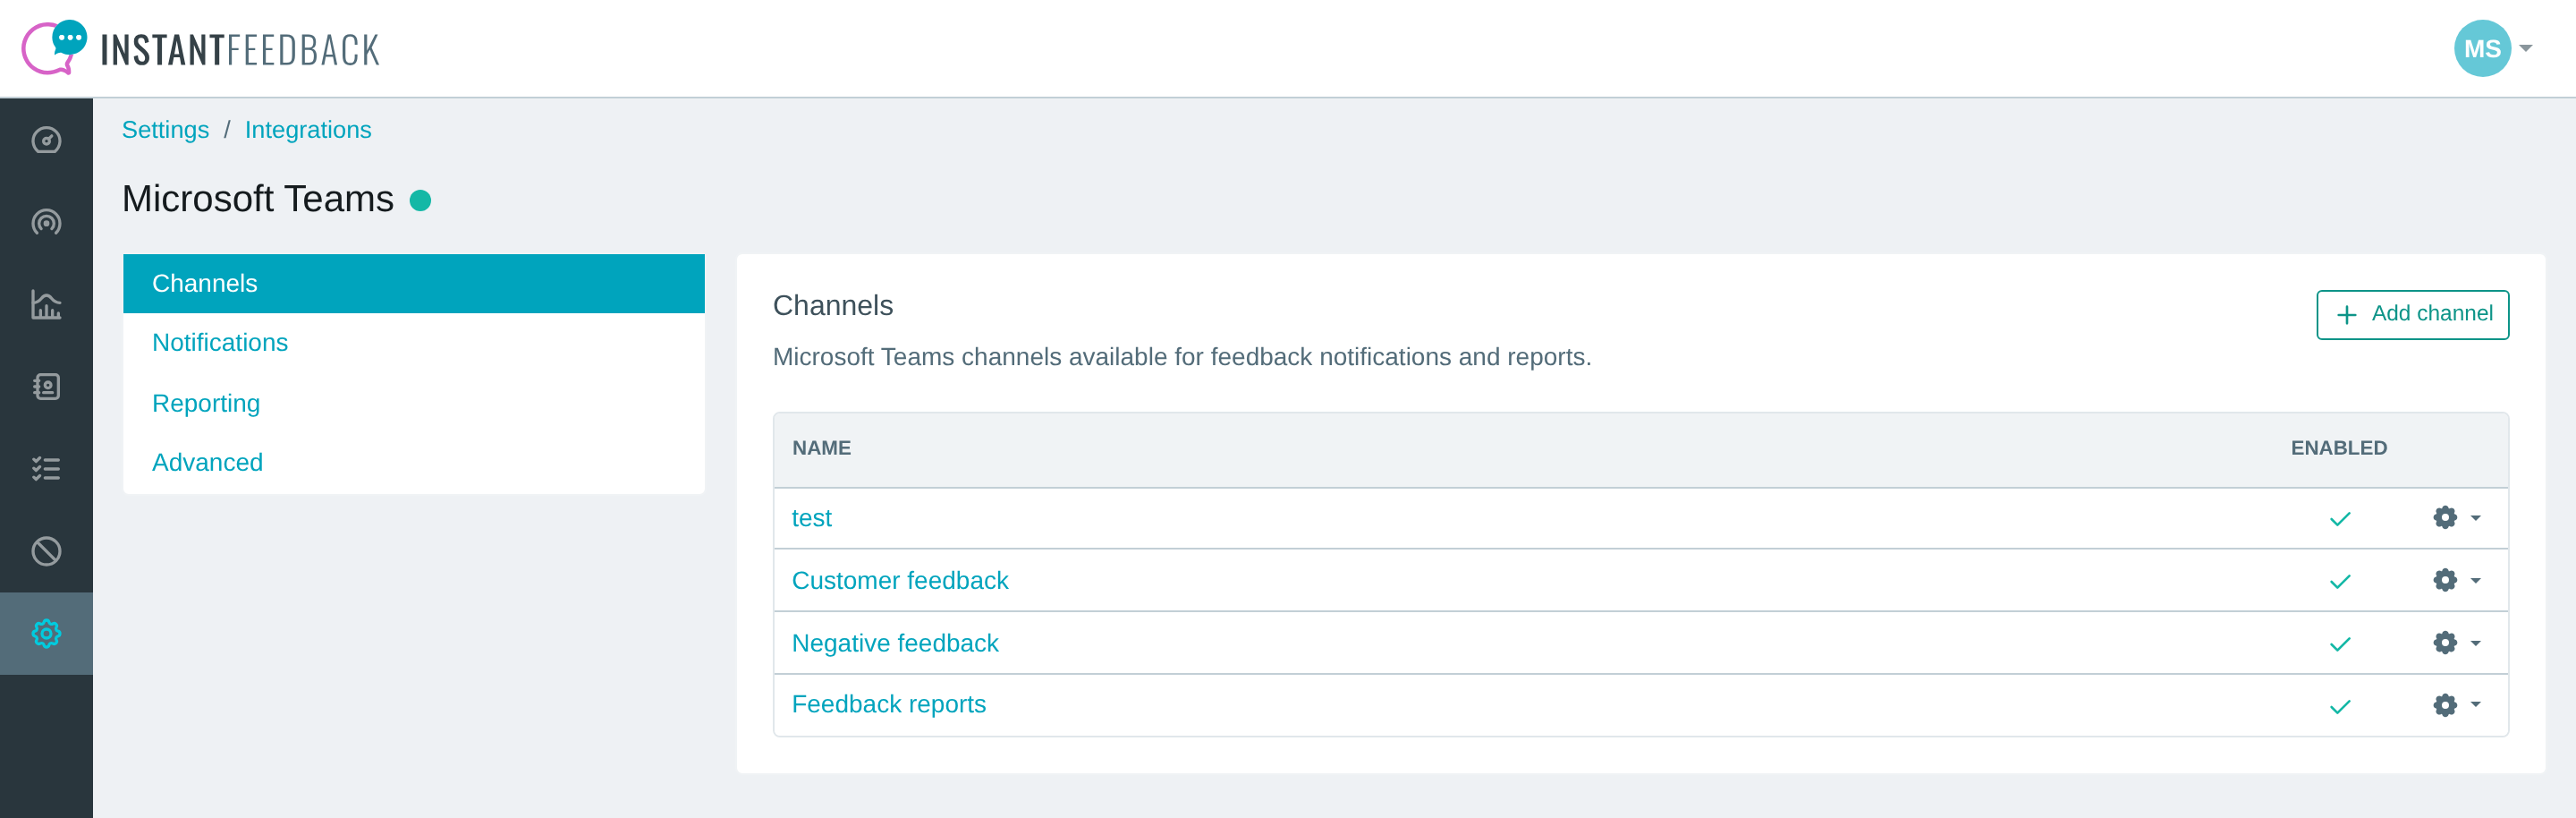
The Channels tab lists every connected channel and whether it is enabled.
Repeat the steps for every channel you want to use, for example one for grades and a separate one for negative comments. Each channel needs its own workflow and webhook URL.
Test right away
After adding a channel, run Test delivery from the channel menu (see below) to make sure the URL works before you assign it to notifications or reports.
Manage a channel
Click the gear icon at the end of a row to open the channel menu.
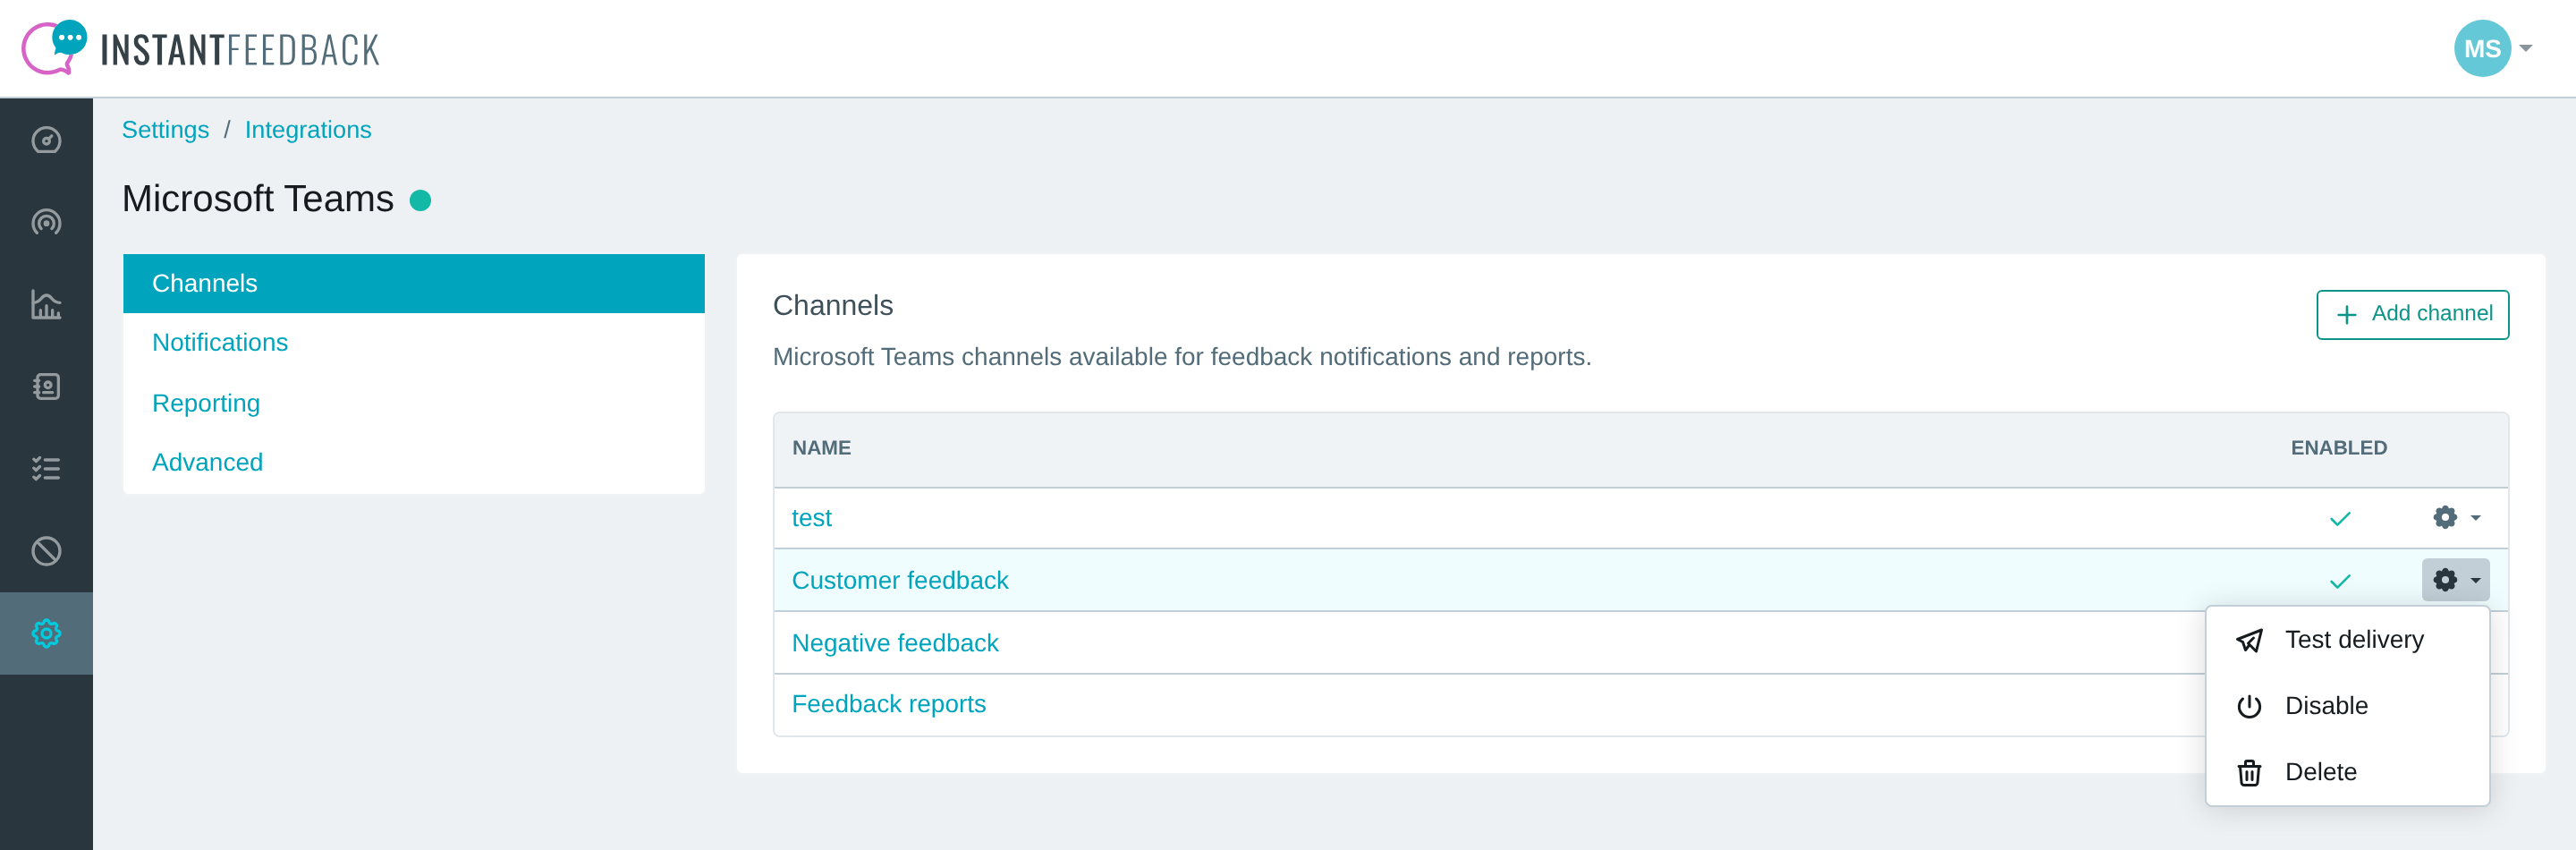
The channel menu.
| Action | What it does |
|---|---|
| Test delivery | Sends a test card to the channel right away and shows the result. |
| Disable / Enable | Pauses or resumes delivery to this channel. Assignments in account and campaign settings are kept. |
| Delete | Removes the channel from InstantFeedback. A channel that is still assigned in account or campaign settings cannot be deleted; unassign it first. |
Click the channel name to change its name or webhook URL. Update the URL here whenever you recreate the workflow in Teams.
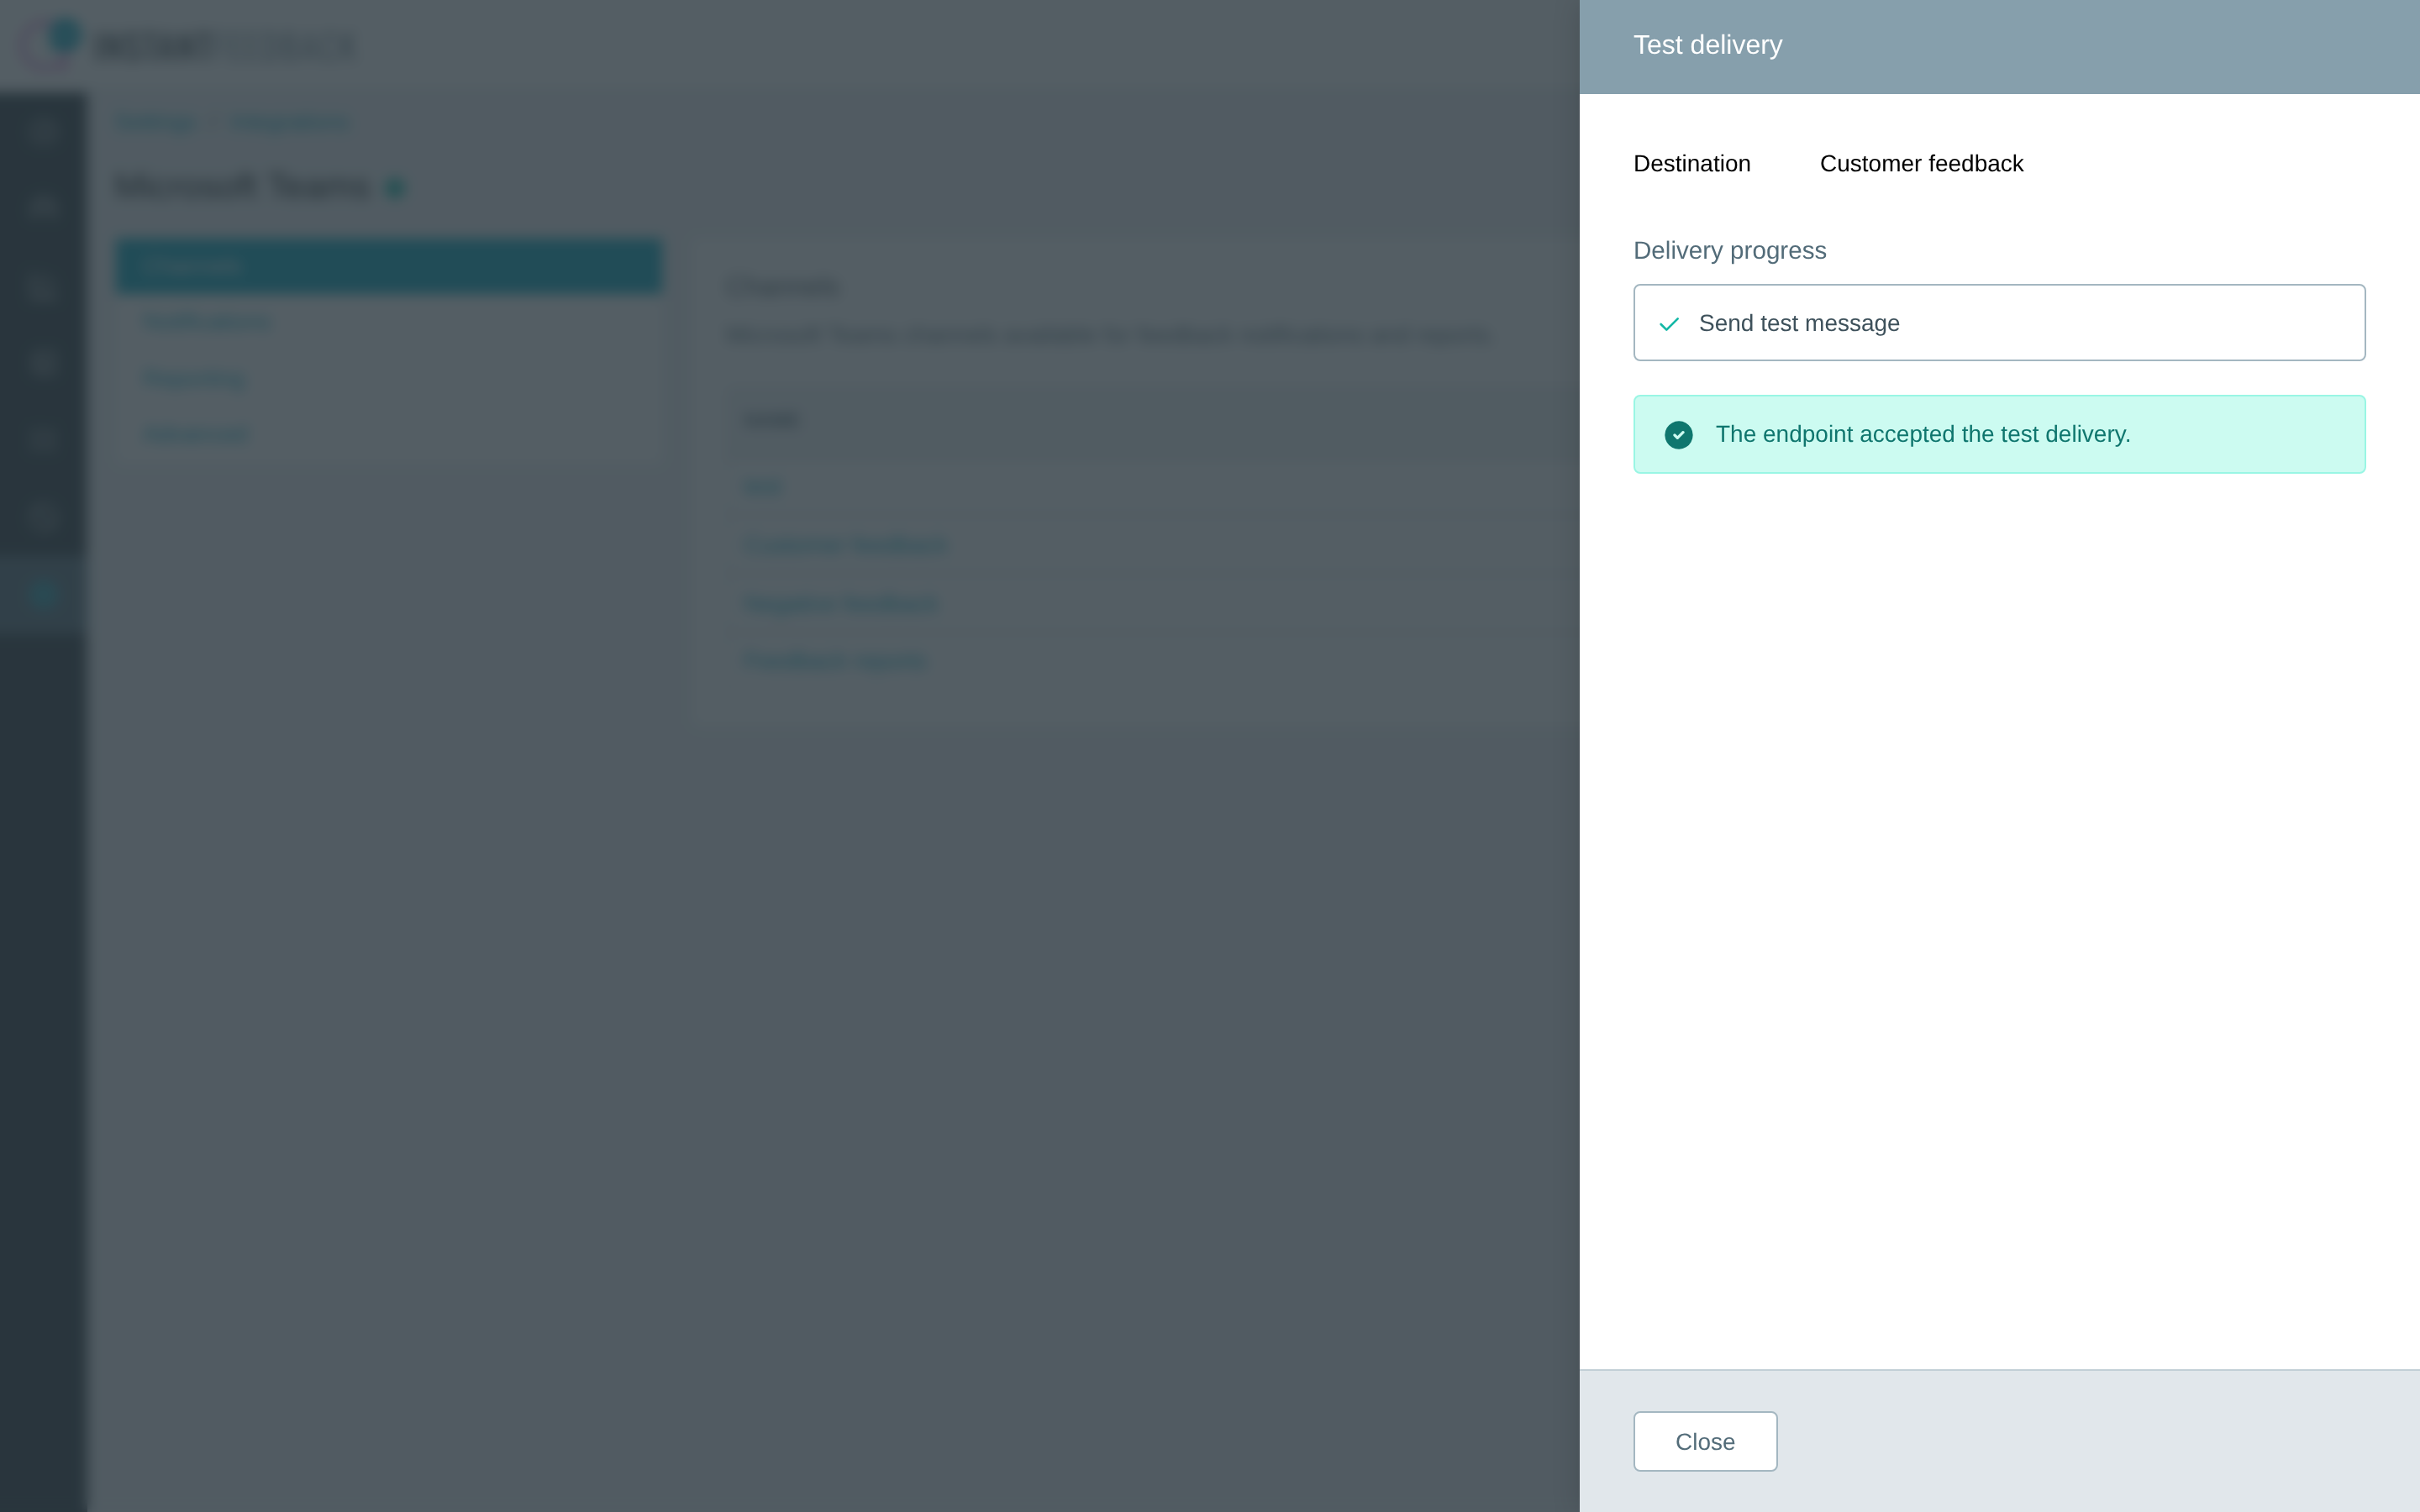
Test delivery confirms that Teams accepted the message.
Note
A successful test means Teams accepted the request. The workflow then posts the card, so it appears in the channel a few seconds later. If it never shows up, check the workflow's run history in the Workflows app.
Default notification channels
The Notifications tab defines where feedback notifications go for all campaigns that do not override the defaults. Click Edit and pick a channel for each of the four types:
| Setting | When it is used |
|---|---|
| For grades | Every time a customer submits a grade. |
| For positive comments | Comments on grades that count as good on the campaign's grading scale. |
| For negative comments | Comments on grades that count as bad on the campaign's grading scale. |
| For other comments | Comments on all remaining grades. |
Leave a setting empty to send nothing for that type.
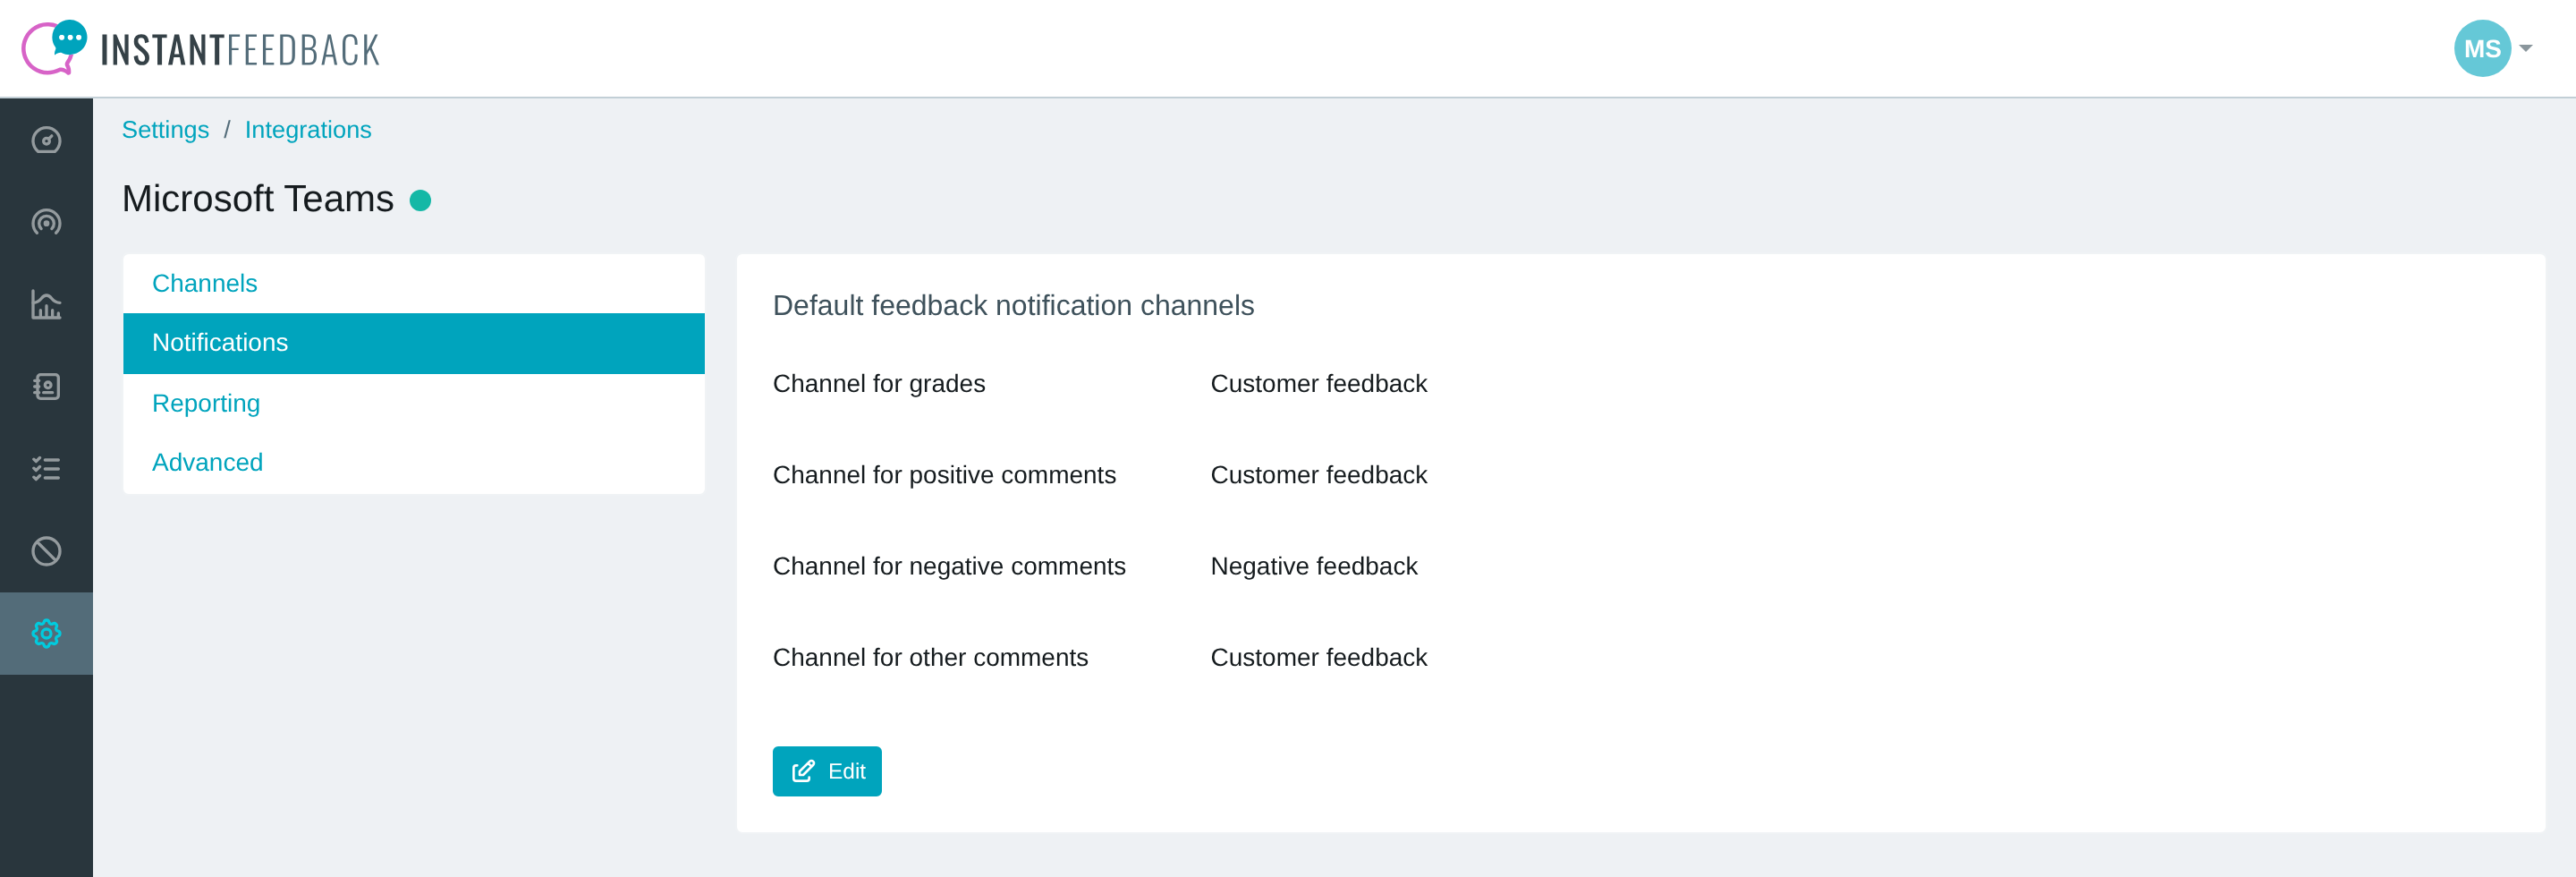
The Notifications tab shows the current defaults.
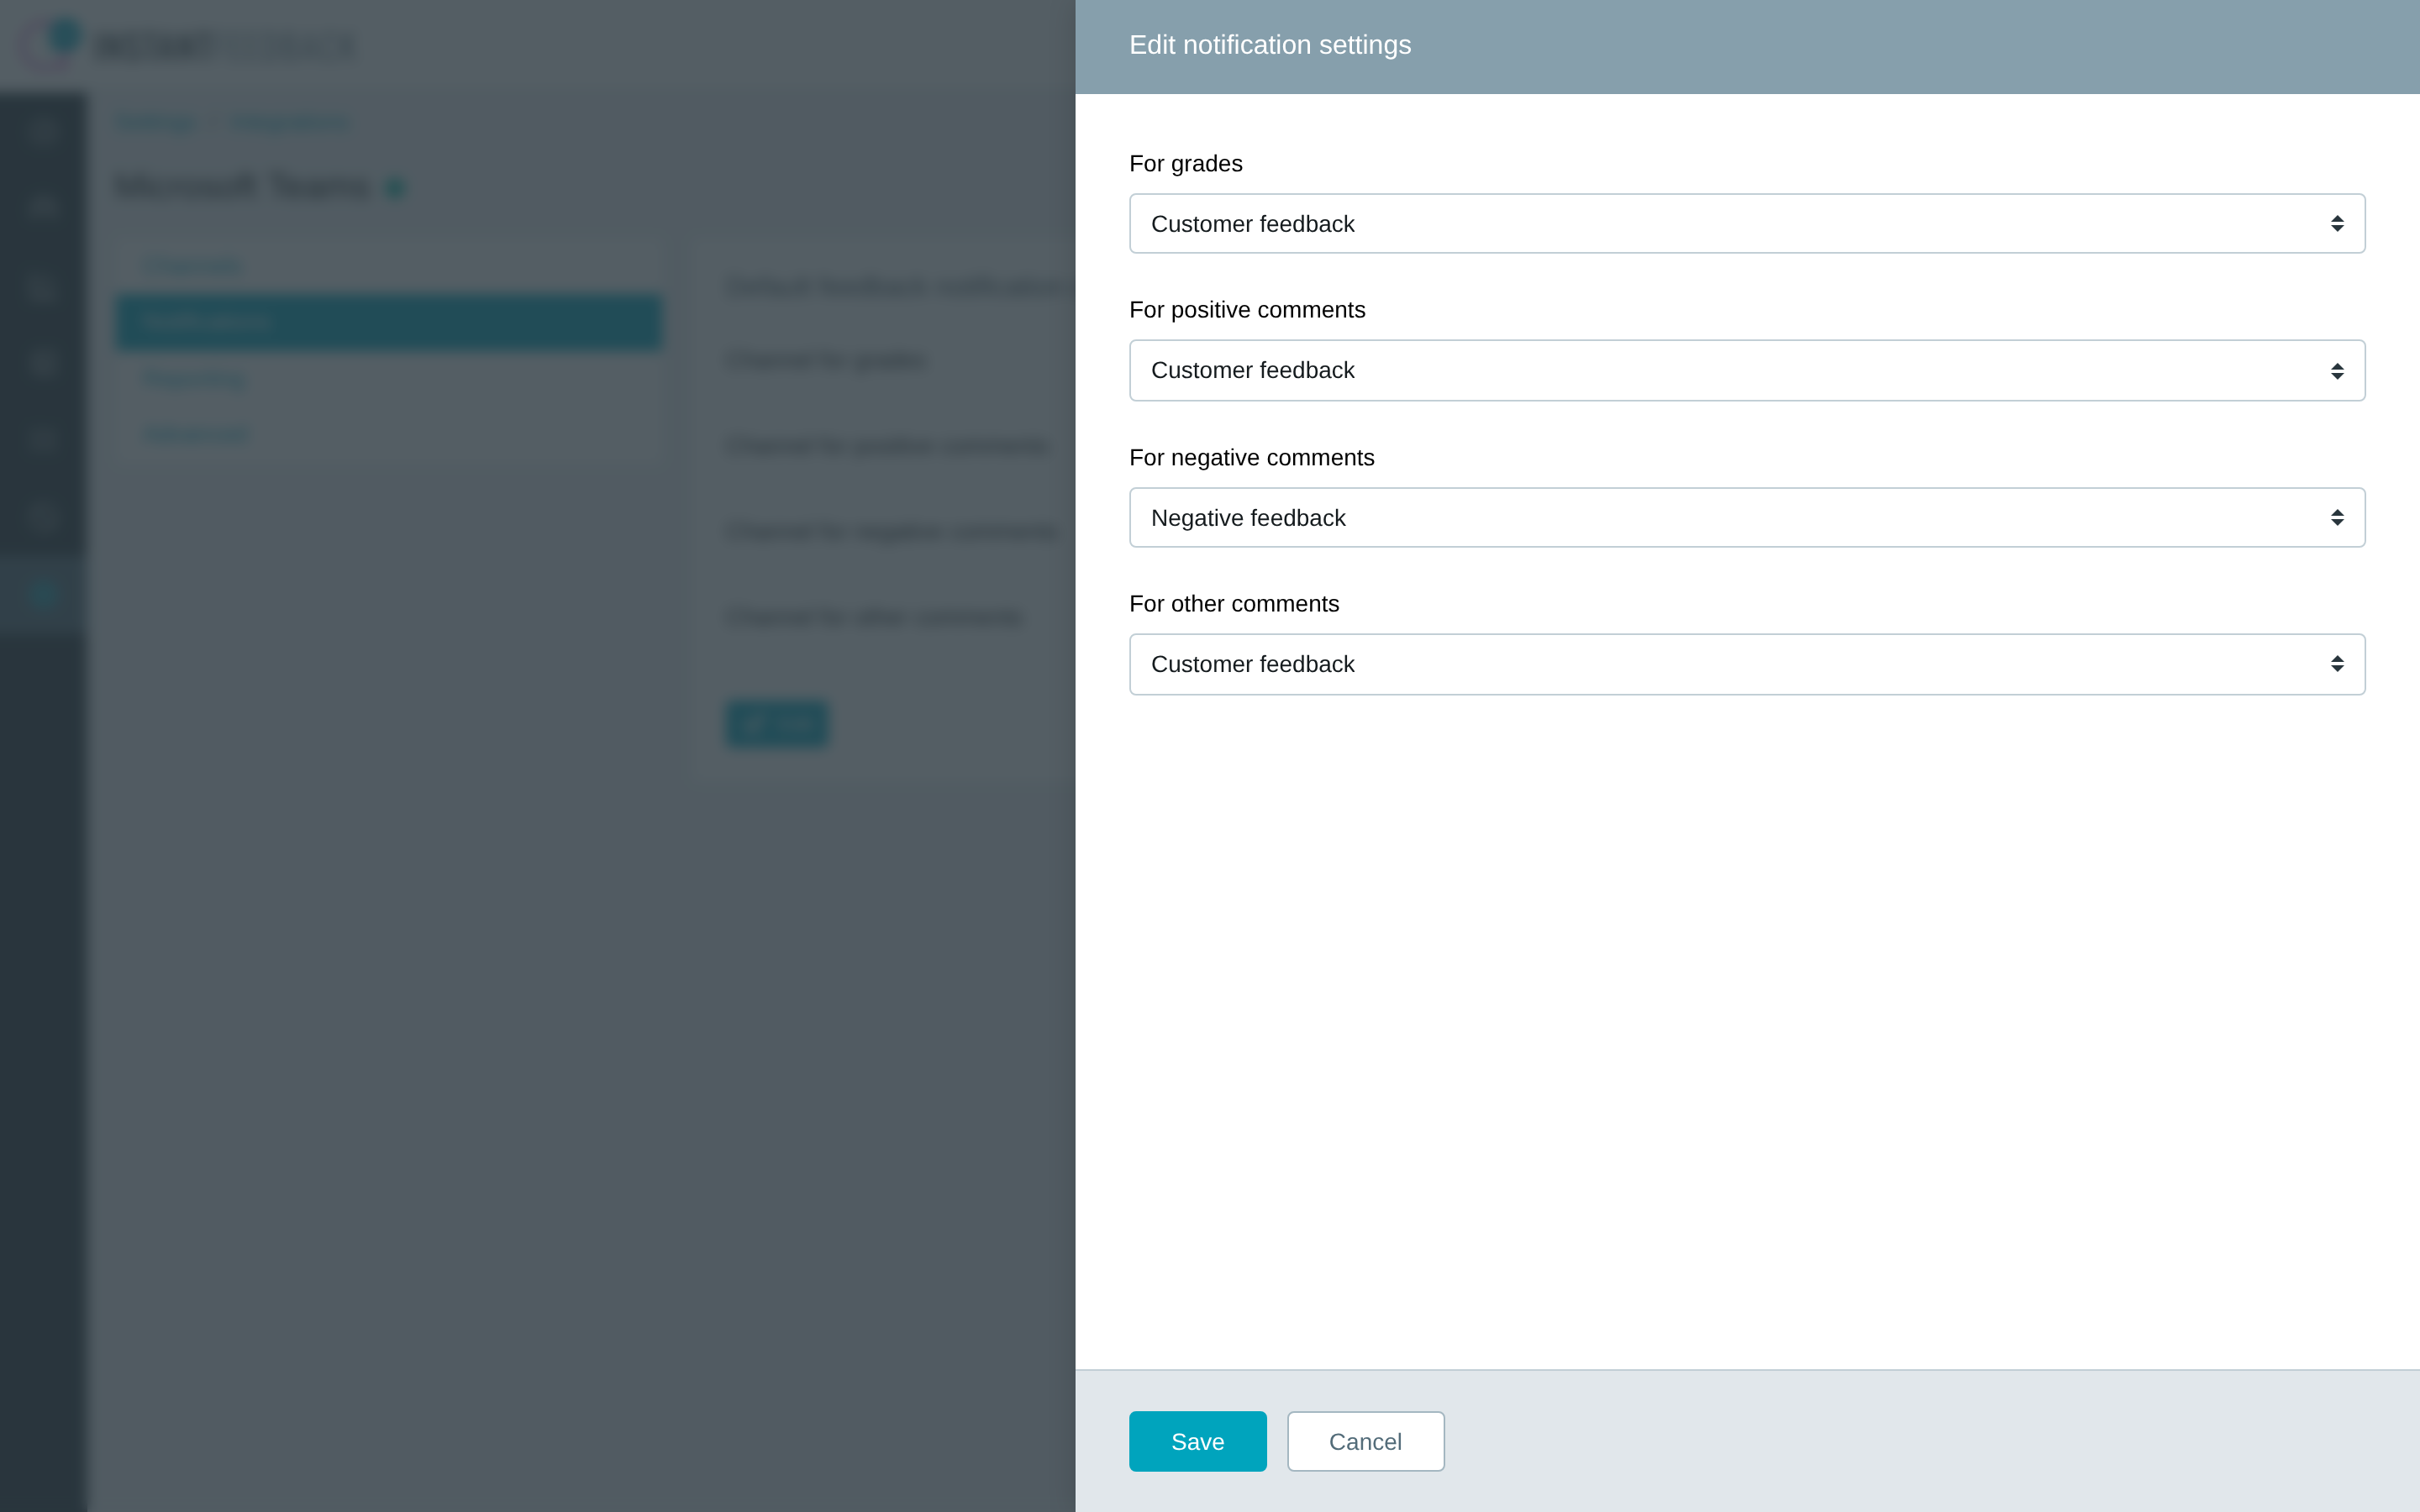
Pick a channel per notification type.
Every notification is posted as a card with the grade, the comment text, the campaign, the customer's contact details, and a View details in app button that opens the feedback entry in InstantFeedback.
Reports
The Reporting tab sets the default report channel and which periodic reports are sent. Click Edit to change them.
| Report | Sent |
|---|---|
| Daily report | Every day at 07:00 for the previous day. |
| Weekly report | Every Monday at 07:15 for the previous week. |
| Monthly report | On the first Monday of the month at 07:30 for the previous month. |
A report is sent per campaign and contains the headline metric of the campaign (NPS, CSAT, average grade, or survey score), its change compared with the previous period, and the number of requests, grades, and comments. Click Show details on the card to expand a breakdown per grade.
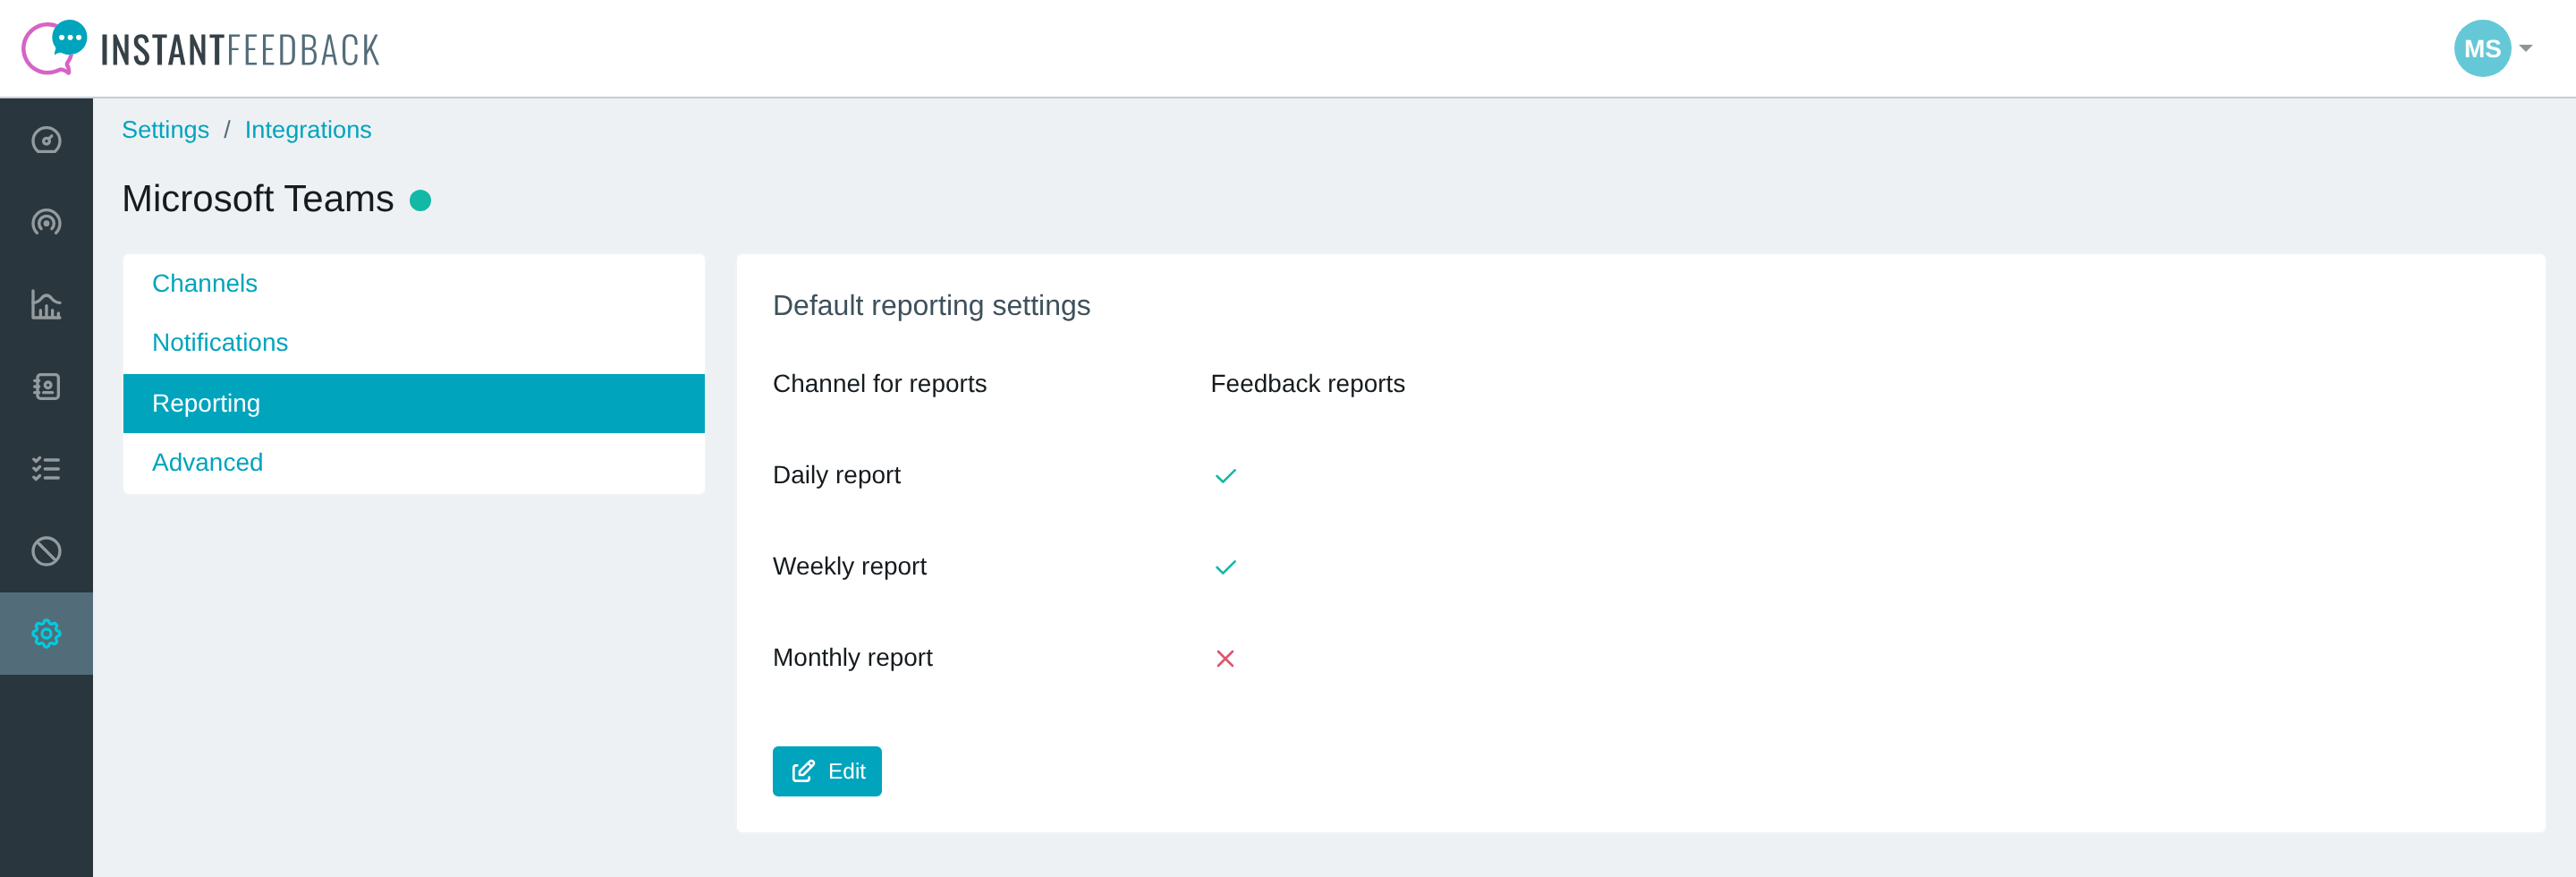
The Reporting tab.
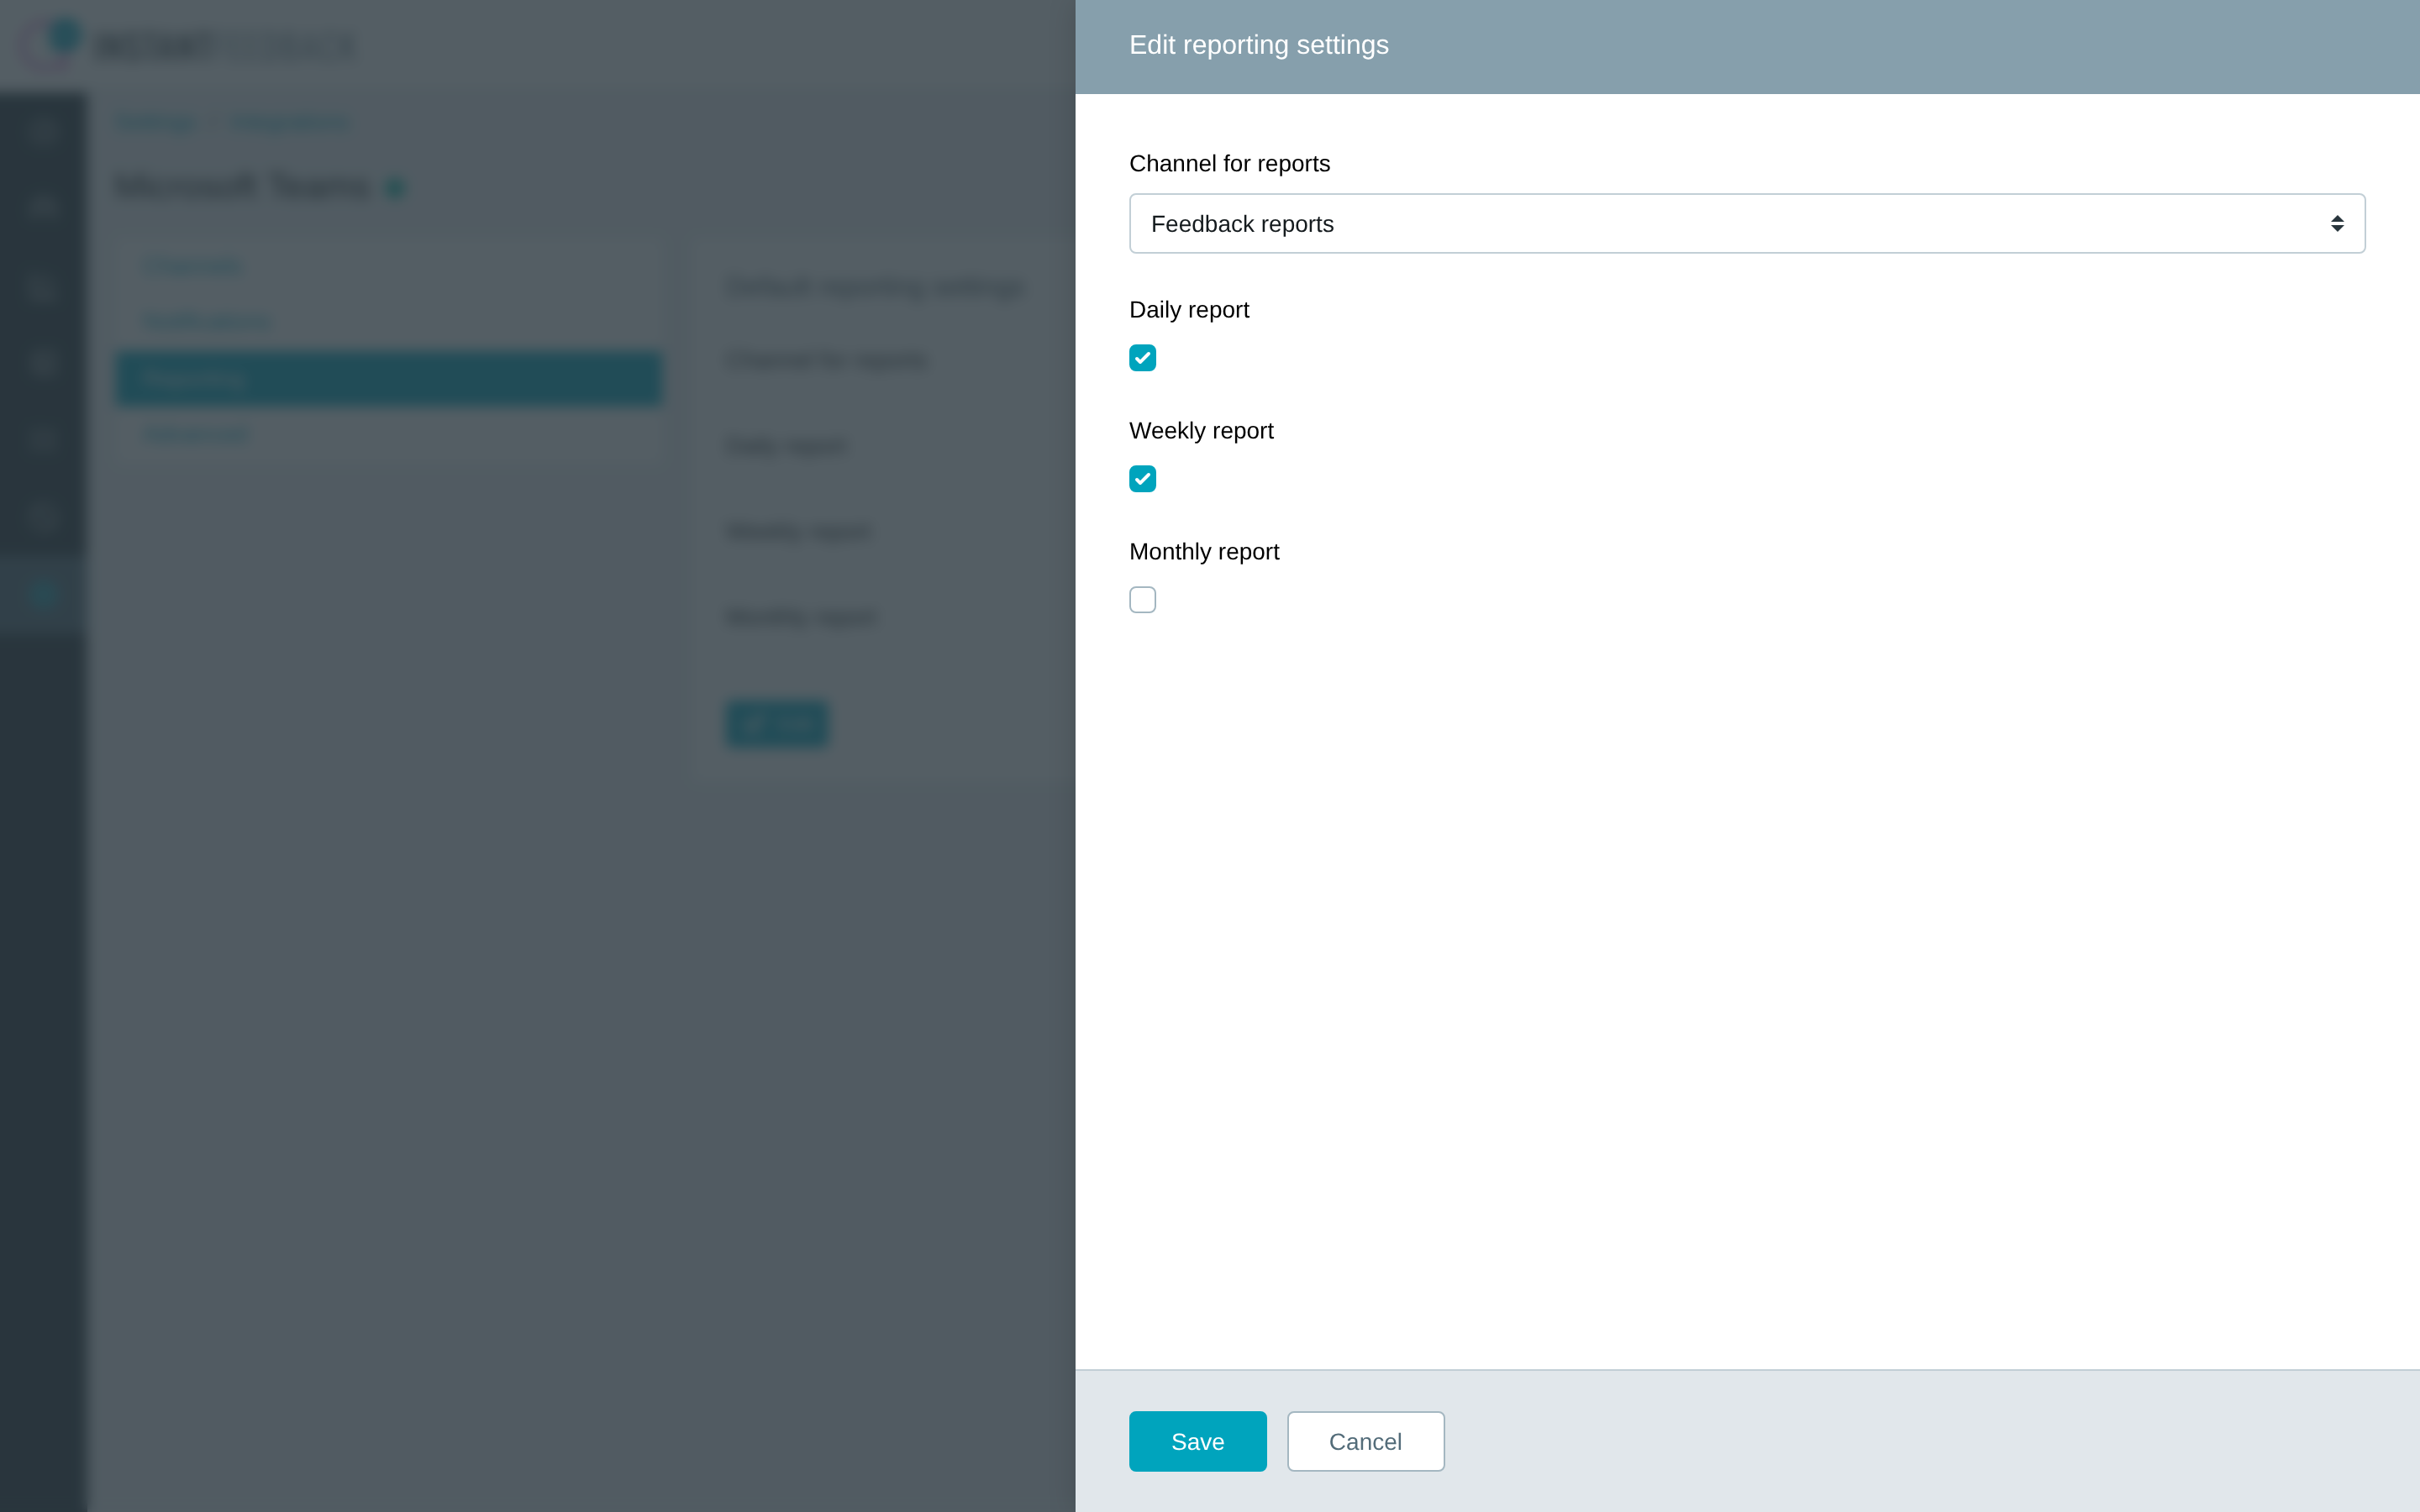
Choose the report channel and switch individual reports on or off.
Note
A report is only sent when it is switched on and a report channel is set, either here or on the campaign.
Per-campaign settings
Every campaign can override the account defaults. Open the campaign, go to Integrations, and select the Microsoft Teams tab.
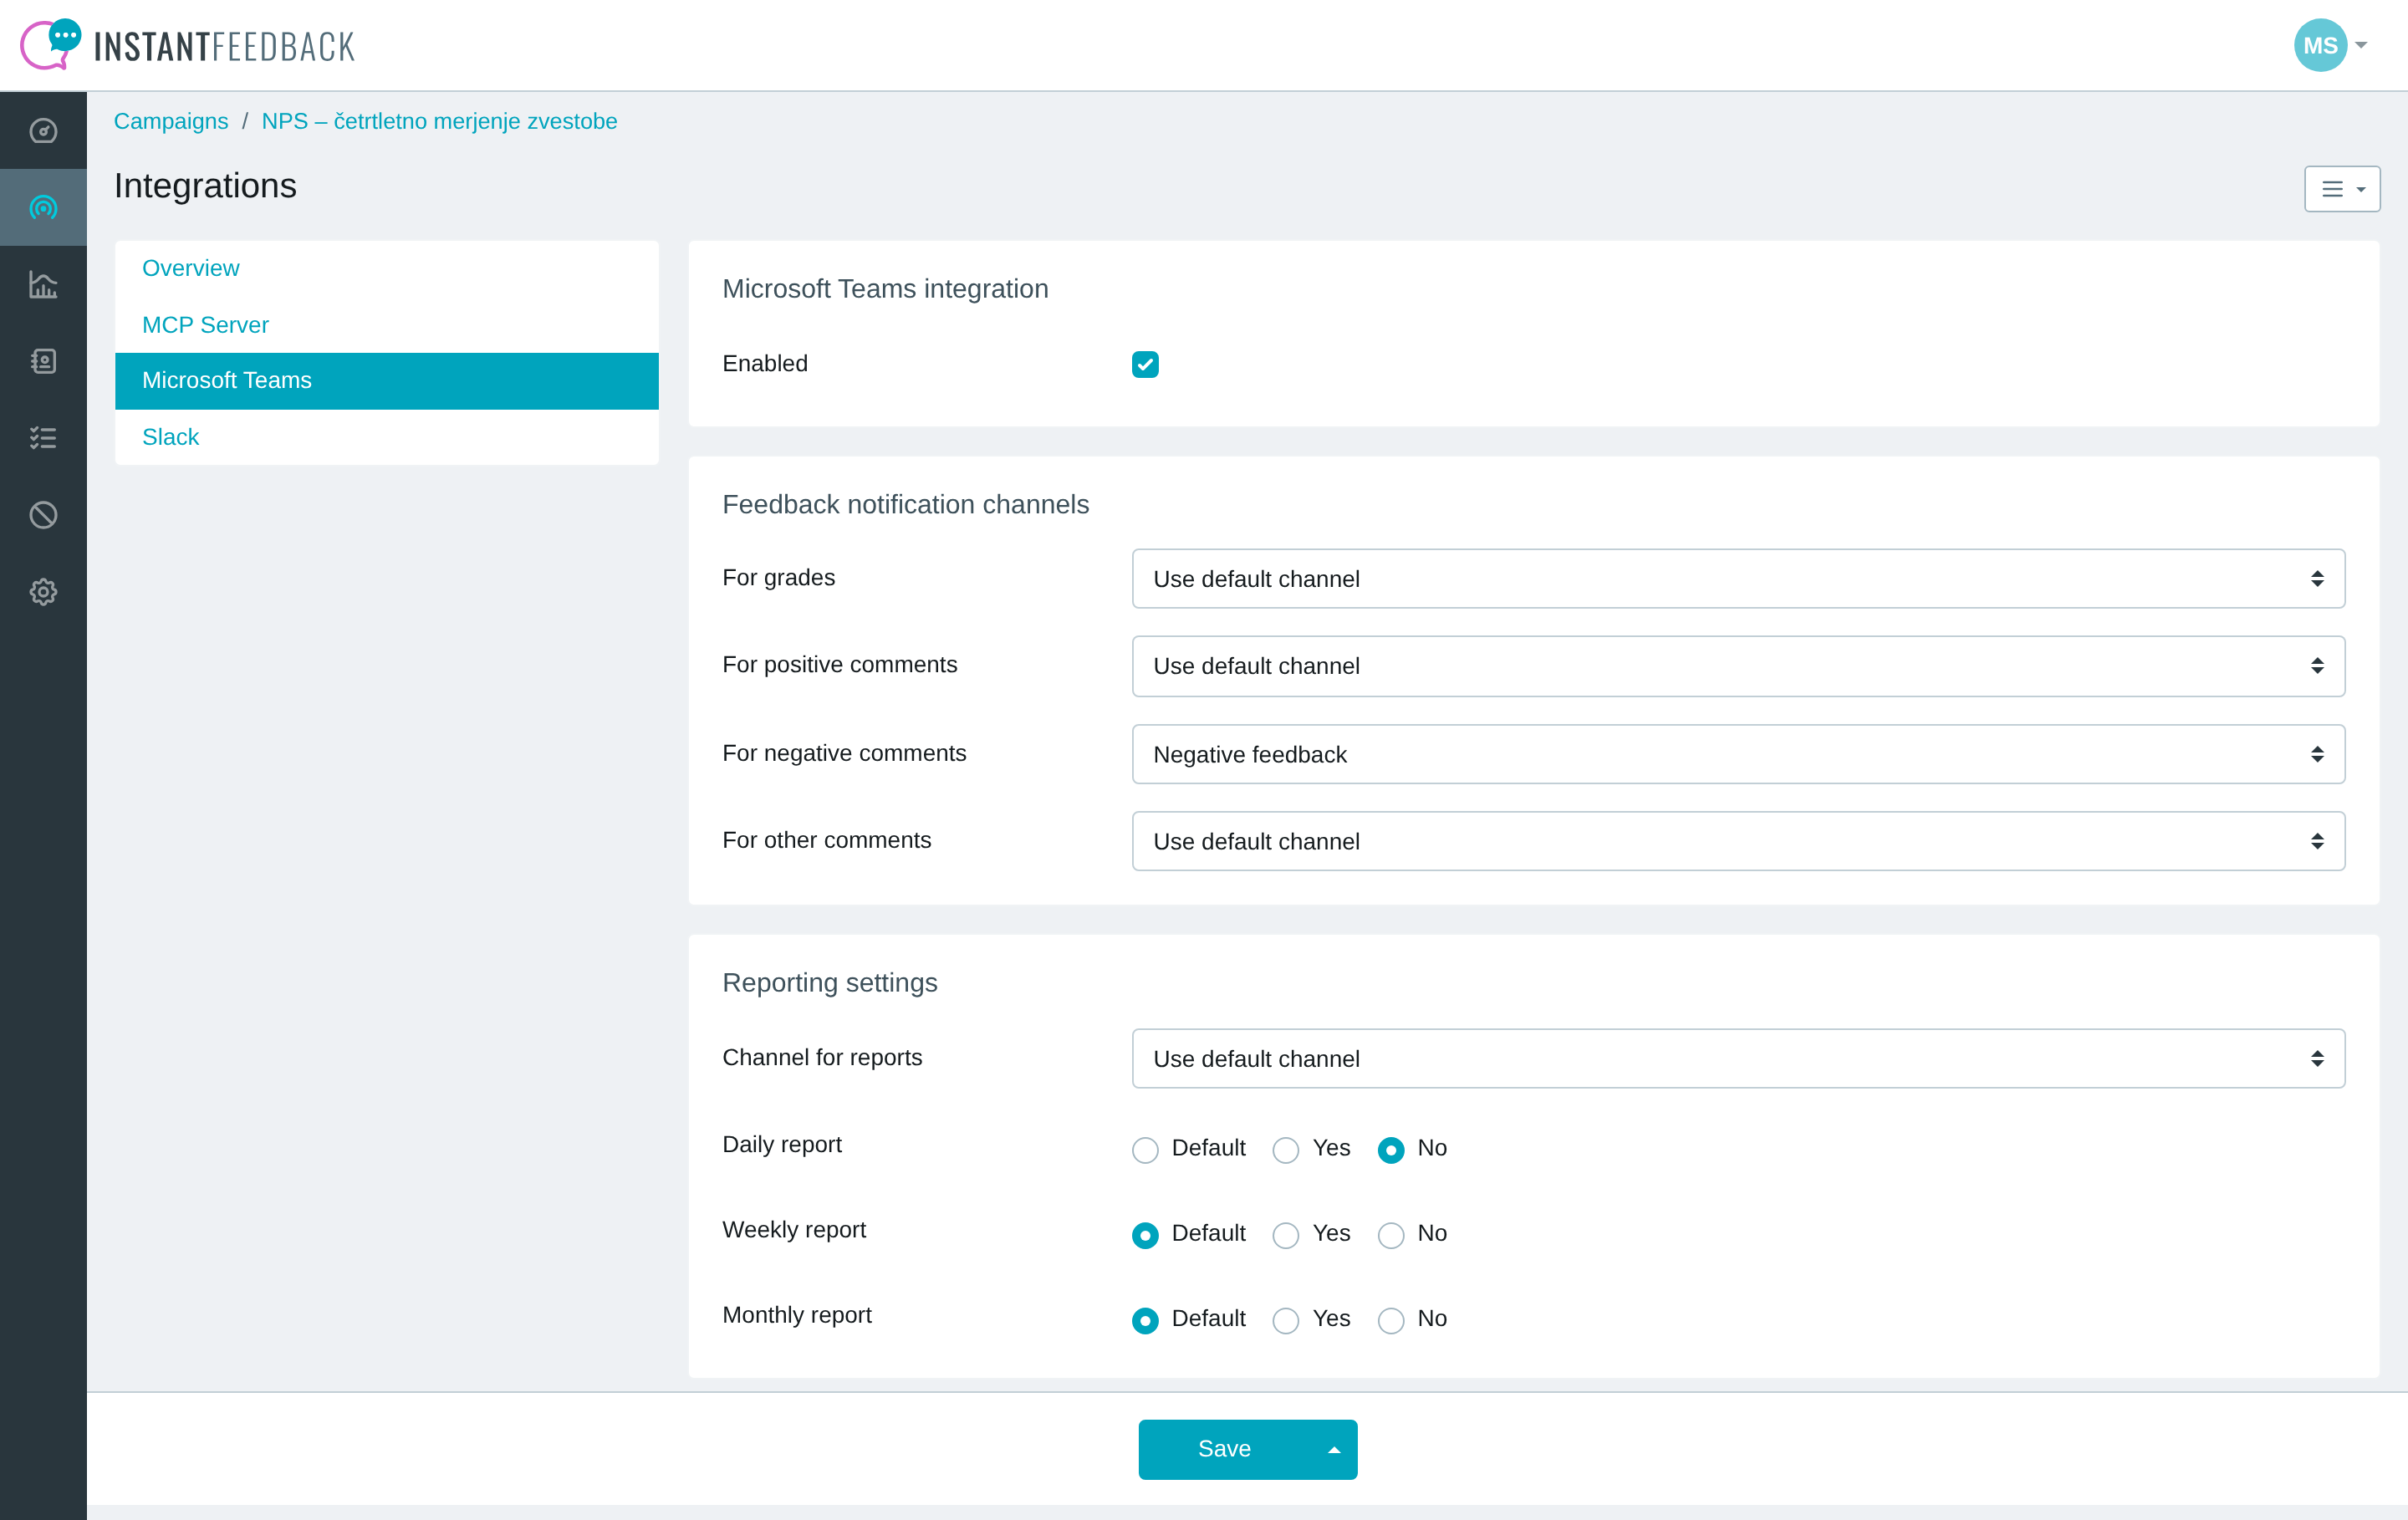
Per-campaign Microsoft Teams settings.
- Enabled switches Teams delivery on for this campaign. Without it, the campaign sends nothing to Teams even if the account defaults are set.
- For each notification and report channel, choose Use default channel, Do not send, or a specific channel.
- For each report, choose Default to follow the account setting, Yes to always send, or No to never send it for this campaign.
Click Save to apply the changes.
Pause, reset, or remove
The Advanced tab shows how many campaigns have a Teams configuration and offers two account-wide actions.
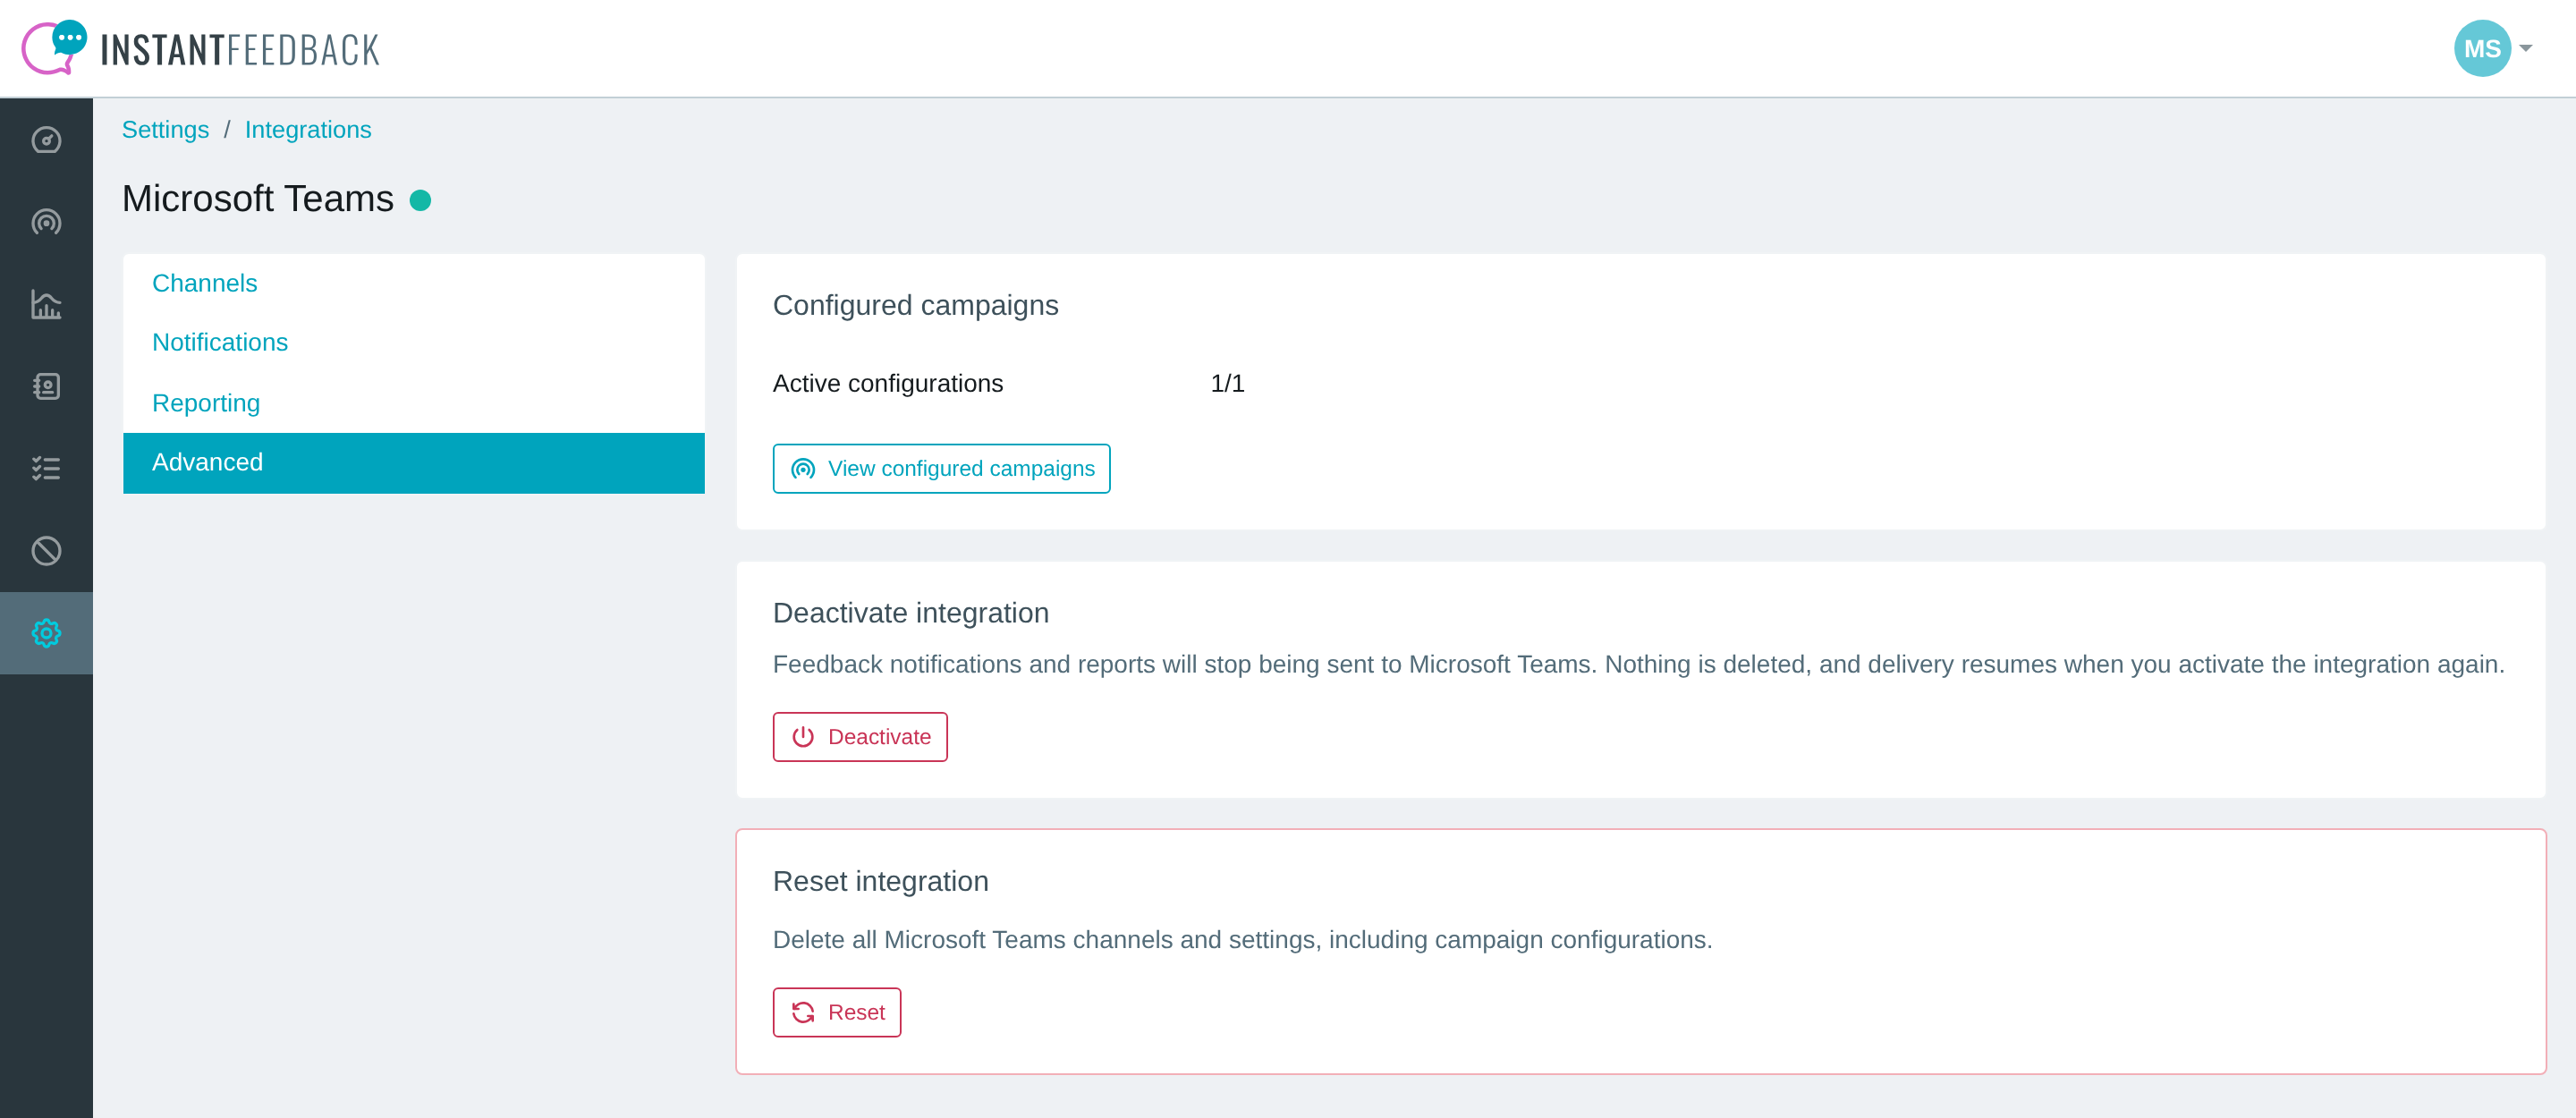
The Advanced tab.
- Deactivate stops all notifications and reports. Nothing is deleted, and delivery resumes when you activate the integration again.
- Reset permanently deletes all channels, notification and reporting settings, and campaign configurations, and deactivates the integration. This cannot be undone.
Workflows stay in Teams
Resetting or deleting channels in InstantFeedback does not remove the workflows from Teams. To revoke a webhook URL, open the Workflows app in Teams and delete or turn off the corresponding workflow.
Troubleshooting
| Message or symptom | What to do |
|---|---|
| Enter a valid URL. when saving a channel | The URL is incomplete or was not pasted fully. Copy the whole URL from Teams; it is long and starts with https://. |
| Test delivery fails with The endpoint rejected the test (HTTP 4xx). | The workflow was deleted or turned off in Teams, or the URL is wrong. Check the workflow in the Workflows app. If you recreated it, click the channel name and paste the new URL. |
| Test delivery fails with Could not connect to the endpoint or The endpoint did not respond in time. | Microsoft's service did not answer. Try again in a few minutes. |
| Test delivery works but no card appears in the channel. | Teams accepted the request but the workflow failed to post. Open the workflow's run history in the Workflows app. A common cause is that the workflow owner left the organisation or lost access to the channel. |
| Test delivery works but no notifications arrive. | Check that the integration is active, the channel is enabled, a channel is assigned for that notification type, and the campaign has Teams Enabled on its Integrations tab. |
| Reports do not arrive. | Check that the report is switched on and a report channel is set at account or campaign level. Reports are only sent for the periods listed above. |
| Unassign this channel from account and campaign settings before deleting it. | The channel is still selected in the Notifications or Reporting tab, or on a campaign. Remove those assignments first, then delete the channel. |